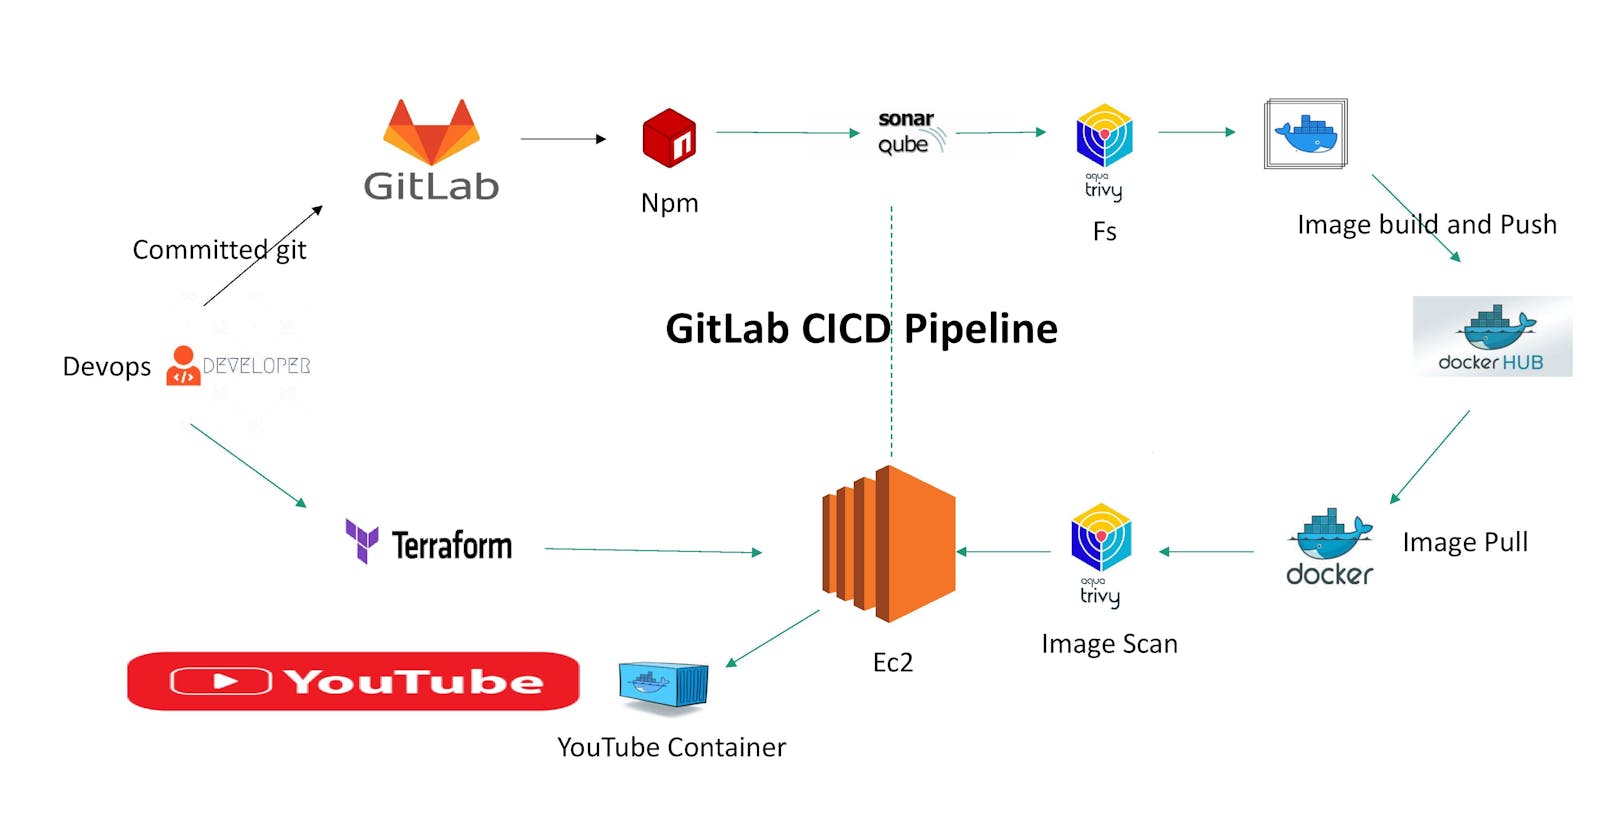
In today’s software development landscape, speed and reliability are paramount. Continuous Integration and Continuous Deployment (CI/CD) pipelines can automate and streamline your development and deployment processes. This guide will show you how to create a complete CI/CD pipeline for a React YouTube app clone using GitLab.
Step 1: Create an API key for Youtube.
Step 2: Create a Repository and push it to GitLab.
Step 3: Terraform using Launch an Ec2 instance and run Sonarqube on it.
Step 4A: Create a .gitlab-ci.yml File.
Step 4B: Add the required variables for the project.
Step 5: Install Gitlab Runner on Ec2.
Step 6: Run the Application on the Docker container.
Step 7: Access the Application on Browser.
Step 1: Create an API key from Rapid API
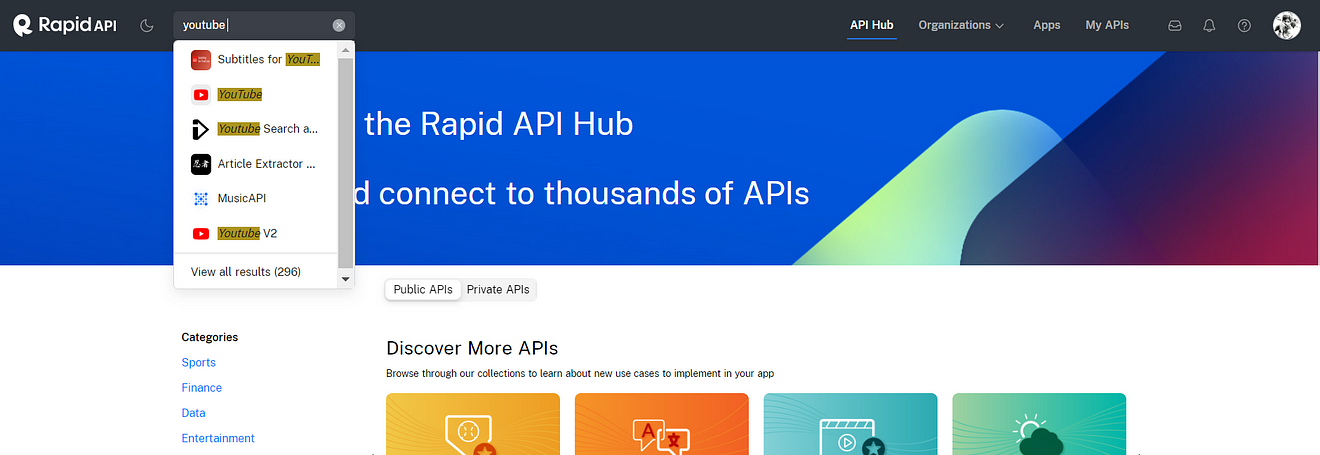
Open a new tab in the browser and search for rapidapi.com
Account is created

Now in the search bar search for YouTube and select YouTube v2
Copy API and save it for further use at the docker stage.
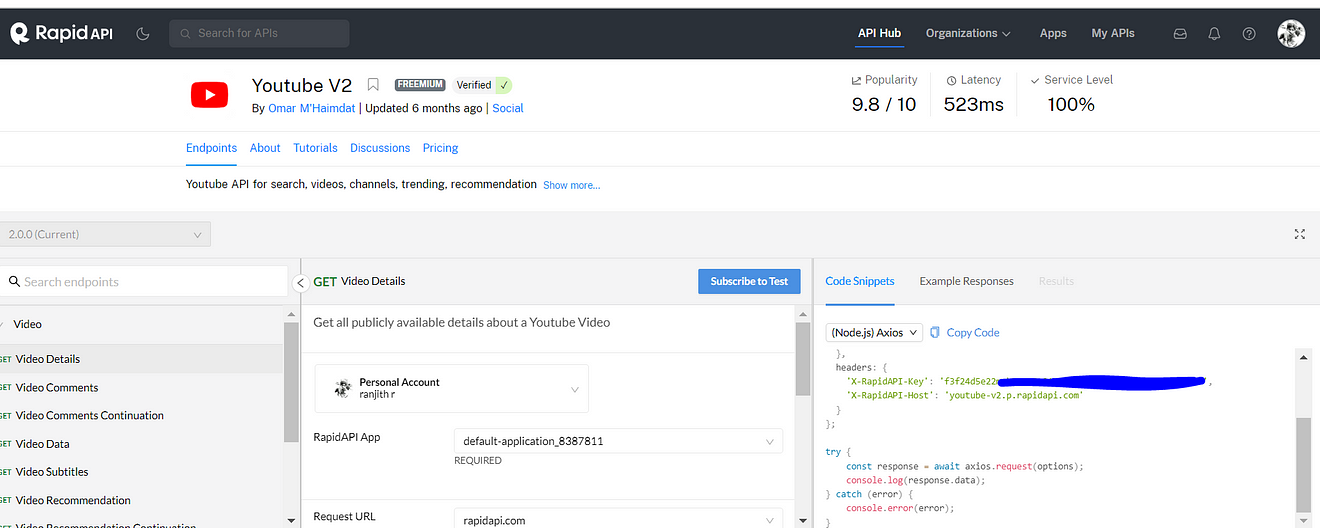
docker build — build-arg REACT_APP_RAPID_API_KEY=<API-KEY> -t ${imageName} .
Step 2: Create a Repository and push it to GitLab
Go to GitLab.com and login to your account
Click on New Project
Click on Create Blank Project
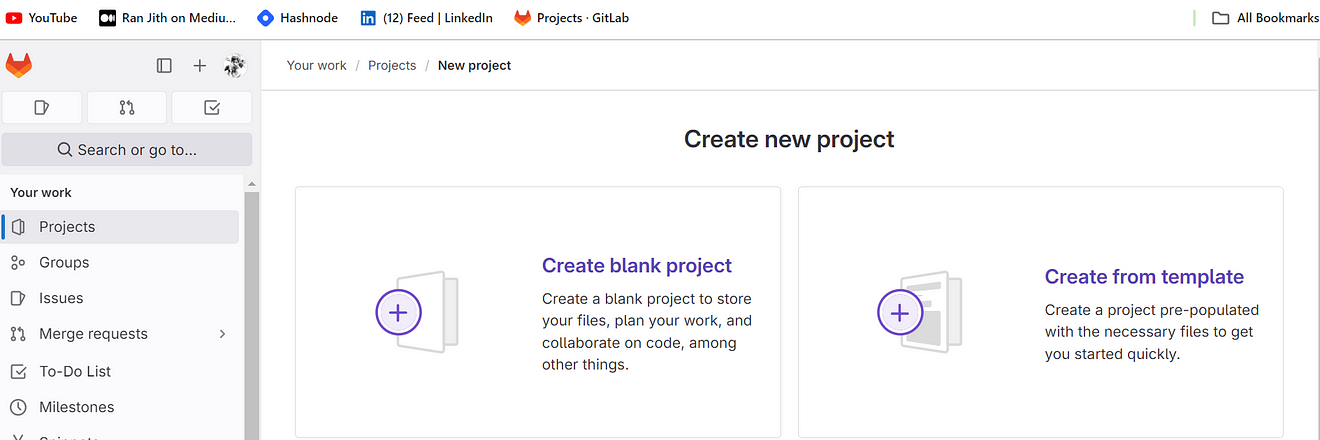
Click on Create Blank Project
Provide a name for the Project
Keep Visibility to the public
Uncheck the Readme and create the Project.
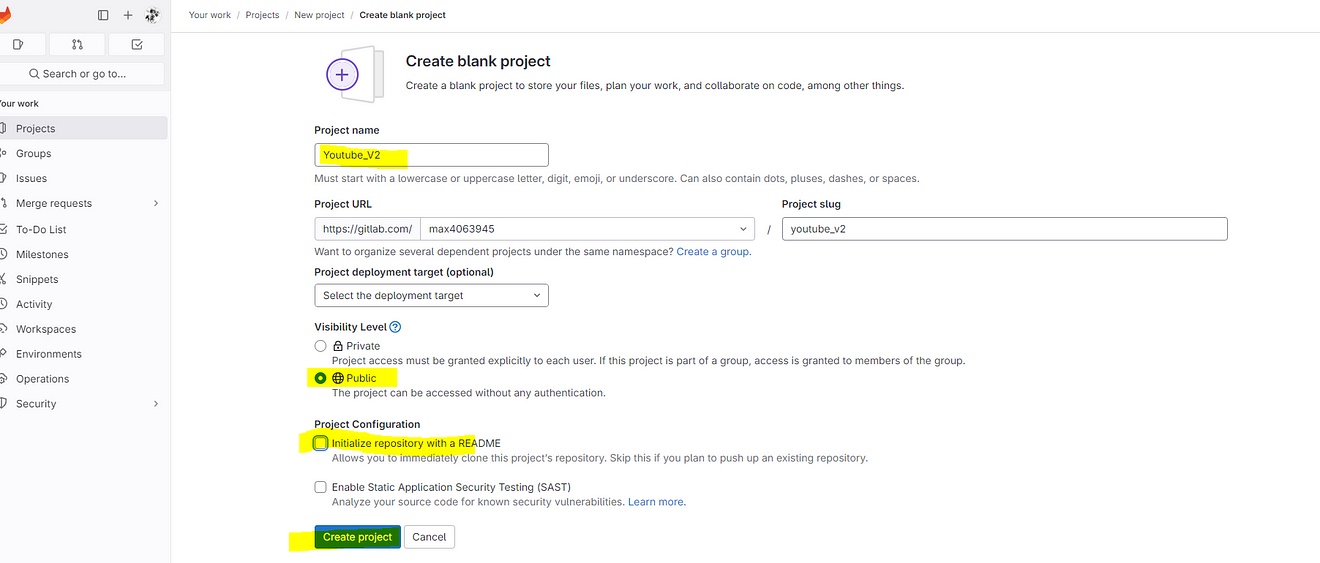
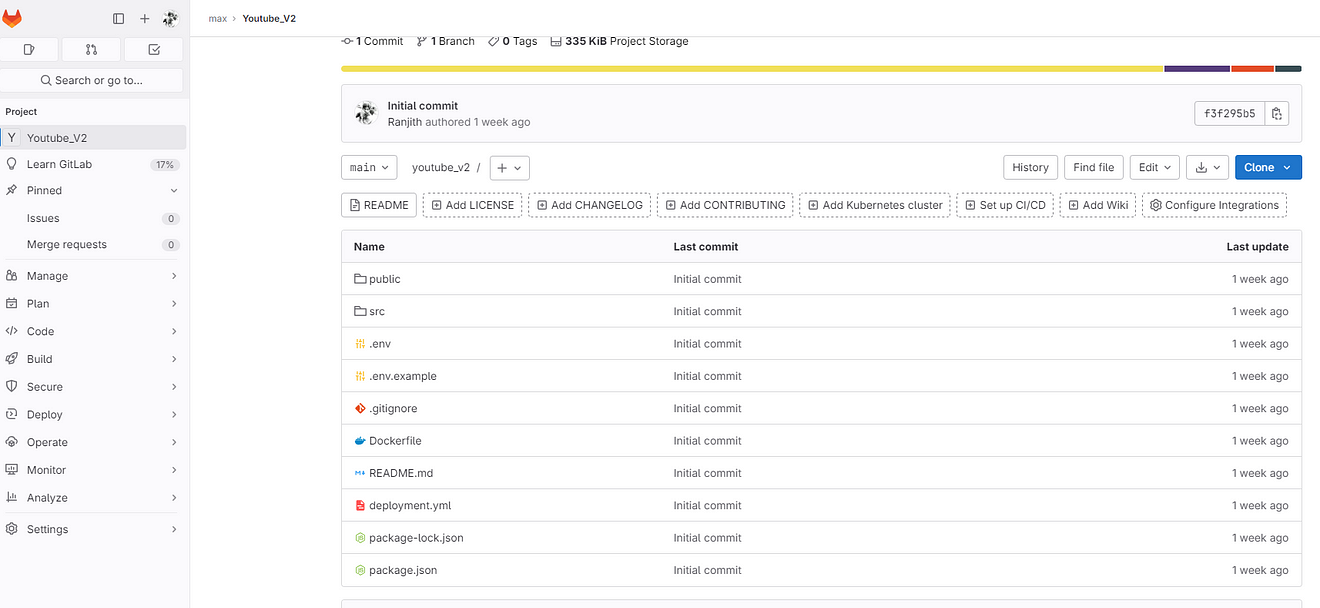
Use the below commands to push code to GitLab

Files pushed to GitLab
Step 3: Terraform using AWS Provider Launch an Ec2 instance and run Sonarqube on it.
Create Terraform Main.tf
Choose an AMI: Select an Ubuntu image.
Choose an Instance Type: Pick “t2.medium.”
Key Pair: Choose an existing key pair or create a new one.
Configure Security Group:
Create a new security group. Add rules for HTTP, and HTTPS, and open all ports for learning purposes.
output IP address
# ec2 creating
resource "aws_instance" "Docker_server" {
  ami           = "ami-0287a05f0ef0e9d9a"
  instance_type = "t2.medium"
  key_name = "ci-cd"
  subnet_id = aws_subnet.Public.id
  vpc_security_group_ids = [ aws_security_group.Devops-sg.id ]
  user_data = templatefile("./install.sh",{})
  associate_public_ip_address = "true"
  tags = {
    Name = "Docker-server-"
  }
}
# security Gp
resource "aws_security_group" "Devops-sg" {
  name        = "Devops-sg"
  description = "Allow TLS inbound traffic"
  vpc_id = aws_vpc.Devops_vpc.id
  ingress = [
    for port in [22, 80, 443, 8080, 9000,8081] : {
      description      = "inbound rules"
      from_port        = port
      to_port          = port
      protocol         = "tcp"
      cidr_blocks      = ["0.0.0.0/0"]
      ipv6_cidr_blocks = []
      prefix_list_ids  = []
      security_groups  = []
      self             = false
    }
  ]

  egress {
    from_port   = 0
    to_port     = 0
    protocol    = "-1"
    cidr_blocks = ["0.0.0.0/0"]
  }

  tags = {
    Name = "Docker"
  }
}
#output ip
  output "ec2_global_ips" {
  value = ["${aws_instance.Docker_server.*.public_ip}"]
}
Create Provider. tf
terraform {
  required_providers {
    aws = {
      source  = "hashicorp/aws"
      version = "~> 4.16"
    }
  }

  required_version = ">= 1.2.0"
}

provider "aws" {
  region  = "ap-south-1"
}
Create Network file VPC.tf
#create Test vpc
resource "aws_vpc" "Devops_vpc" {
  cidr_block       = "10.0.0.0/16"
  instance_tenancy = "default"

  tags = {
    Name = "Devops-Vpc"
  }
}
#create Public subnet
resource "aws_subnet" "Public" {
  availability_zone = "ap-south-1a"
  vpc_id            = aws_vpc.Devops_vpc.id
  cidr_block        = "10.0.2.0/24"

  tags = {
    Name = "Public-subnet"
  }

}
#create Private subnet
resource "aws_subnet" "Private" {
  availability_zone = "ap-south-1b"
  vpc_id            = aws_vpc.Devops_vpc.id
  cidr_block        = "10.0.1.0/24"

  tags = {
    Name = "Private-subnet"
  }

}
#create Route Table private
resource "aws_route_table" "Pri_R" {
  vpc_id = aws_vpc.Devops_vpc.id

  tags = {
    Name = "Private Route table "
  }

}
#create Route Table public
resource "aws_route_table" "Pub_R" {
  vpc_id = aws_vpc.Devops_vpc.id
  route {
    cidr_block = "0.0.0.0/0"
    gateway_id = aws_internet_gateway.IGW.id
  }
  tags = {
    Name = "Public Route table "
  }

}
#Private Route table subnet associastions
resource "aws_route_table_association" "RT_A_Pri-sub" {
  subnet_id      = aws_subnet.Private.id
  route_table_id = aws_route_table.Pri_R.id
}
#Public Route table subnet associastions
resource "aws_route_table_association" "RT_A_Pub-sub" {
  subnet_id      = aws_subnet.Public.id
  route_table_id = aws_route_table.Pub_R.id
}
#create internet gateway
resource "aws_internet_gateway" "IGW" {
  vpc_id = aws_vpc.Devops_vpc.id # attach vpc

  tags = {
    Name = "IGW"
  }
}
Create User Data File $install. sh
This will install Docker and Sonarqube
#! /bin/bash

#install docker
sudo apt-get update
sudo apt-get install docker.io -y
sudo usermod -aG docker ubuntu
newgrp docker
sudo chmod 777 /var/run/docker.sock
#sonarqube
docker run -d --name sonar -p 9000:9000 sonarqube:lts-community
Terraform commands to provision
terraform init
terraform validate
terraform plan
terraform apply
Now copy the IP address of the ec2 instance
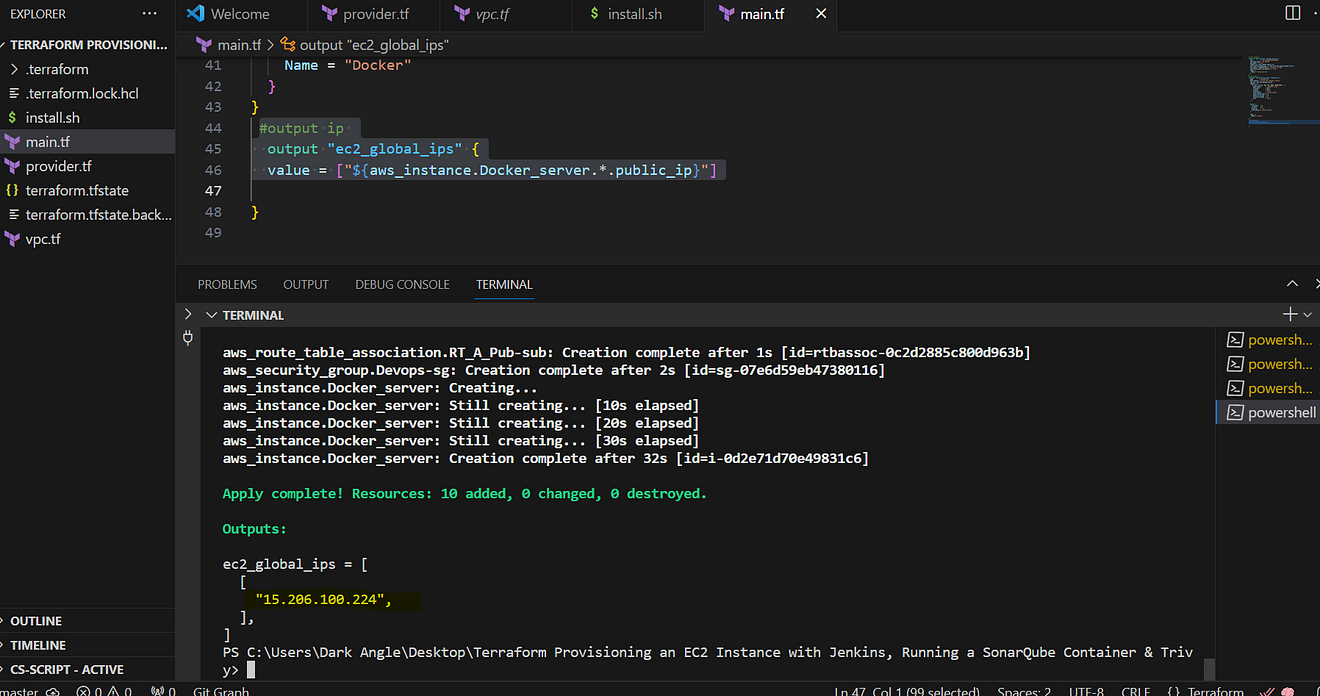
<ec2-public-ip:9000>
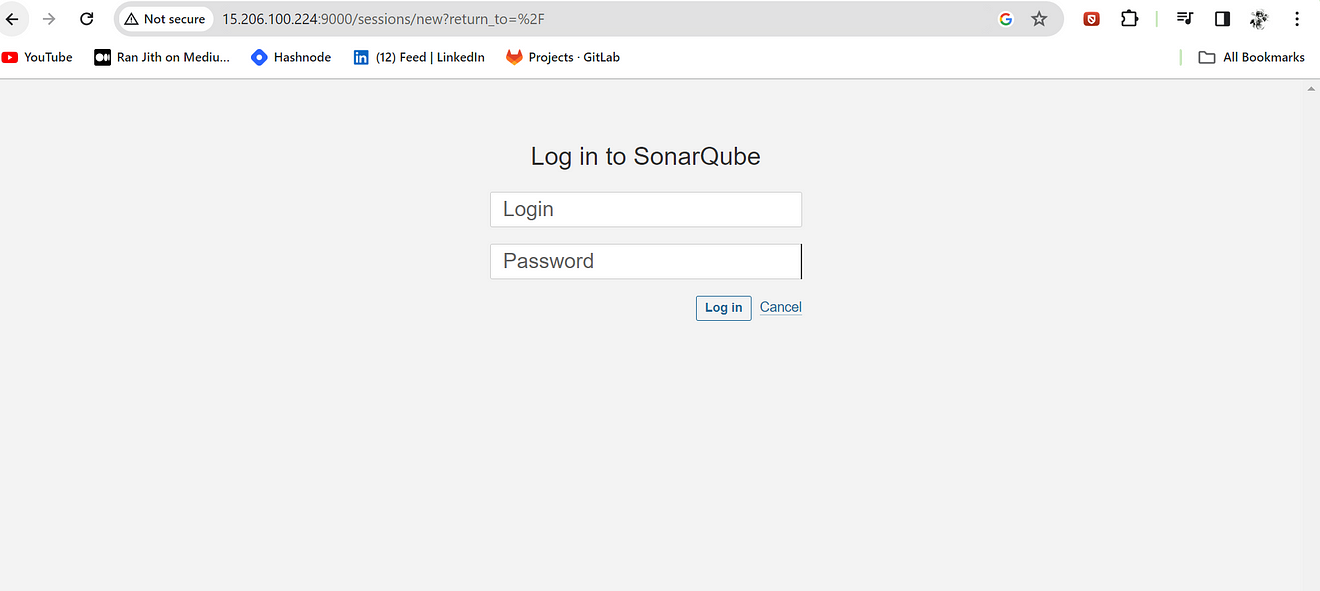
Enter username and password, click on login and change password
username admin
password admin
Update New password, This is Sonar Dashboard.
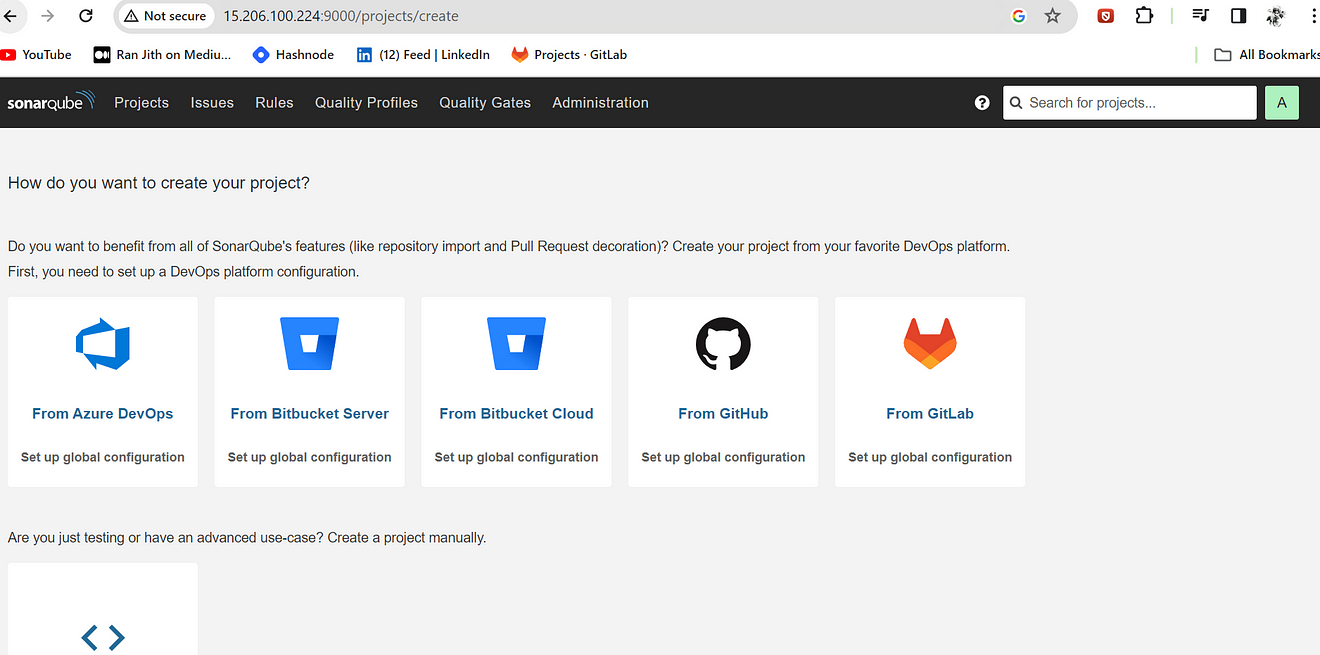
Step 4A: Create a .gitlab-ci.yml File.
Now go to GitLab click on ‘+’ and click on Newfile
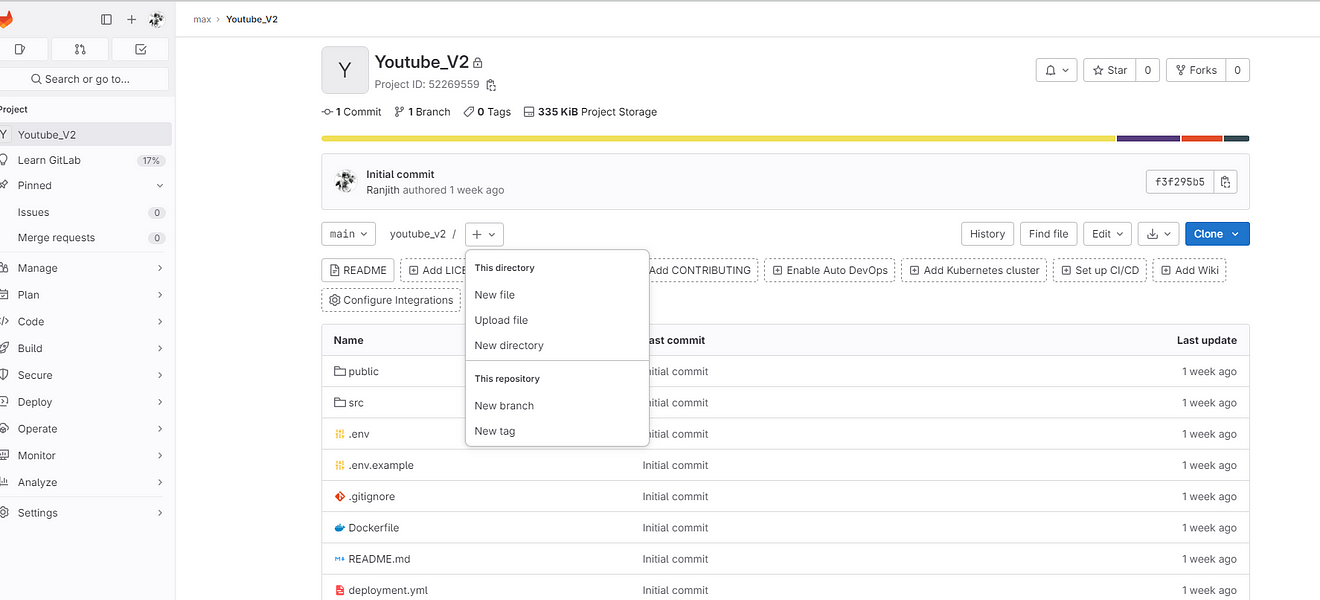
File name .gitlab-ci.yml
Content
stages:
    - npm

Install dependecy:
    stage: npm
    image:
        name: node:16
    script:
        - npm install
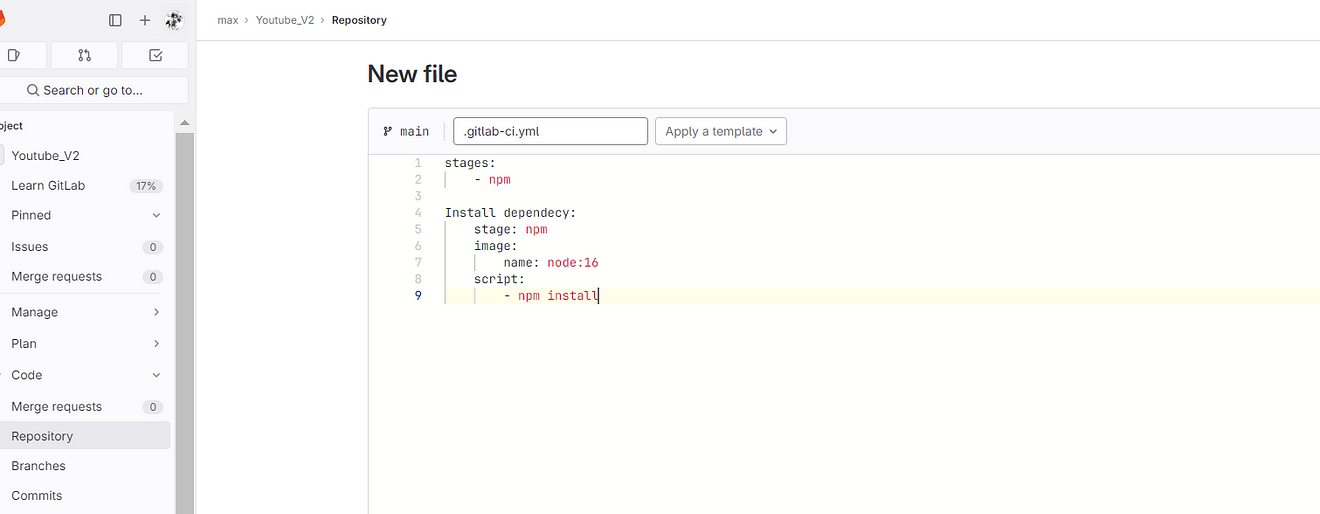
Commit the changes and it will automatically start the build
Now click on Build and Pipelines
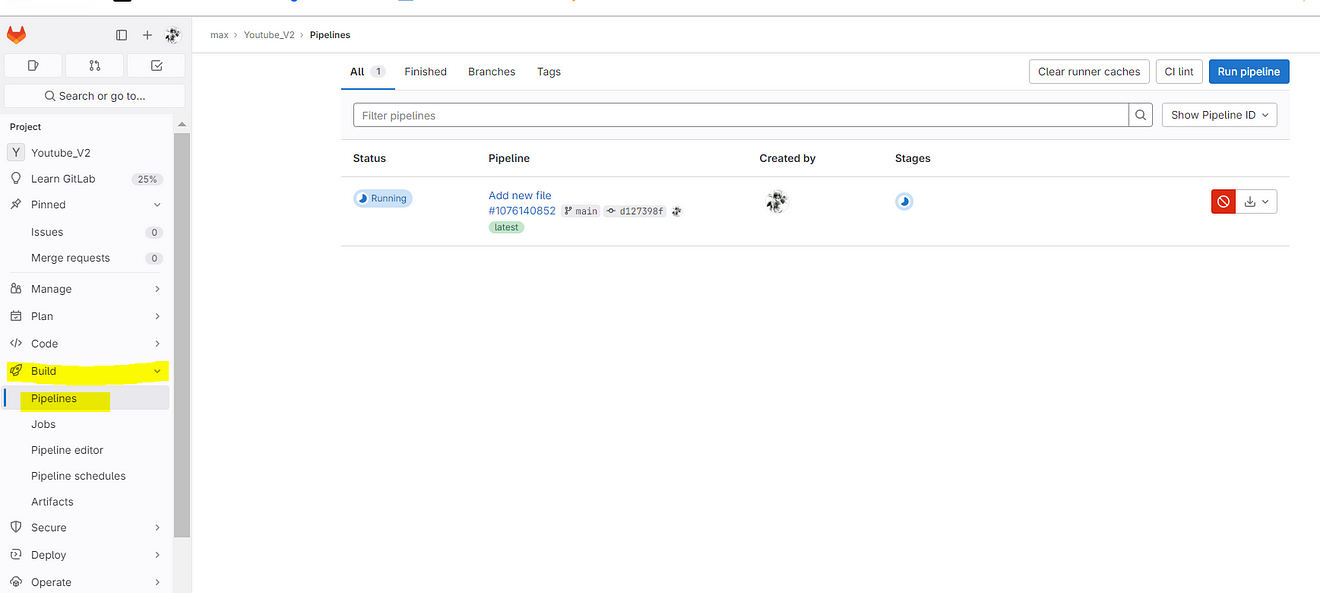
Now click on Running.
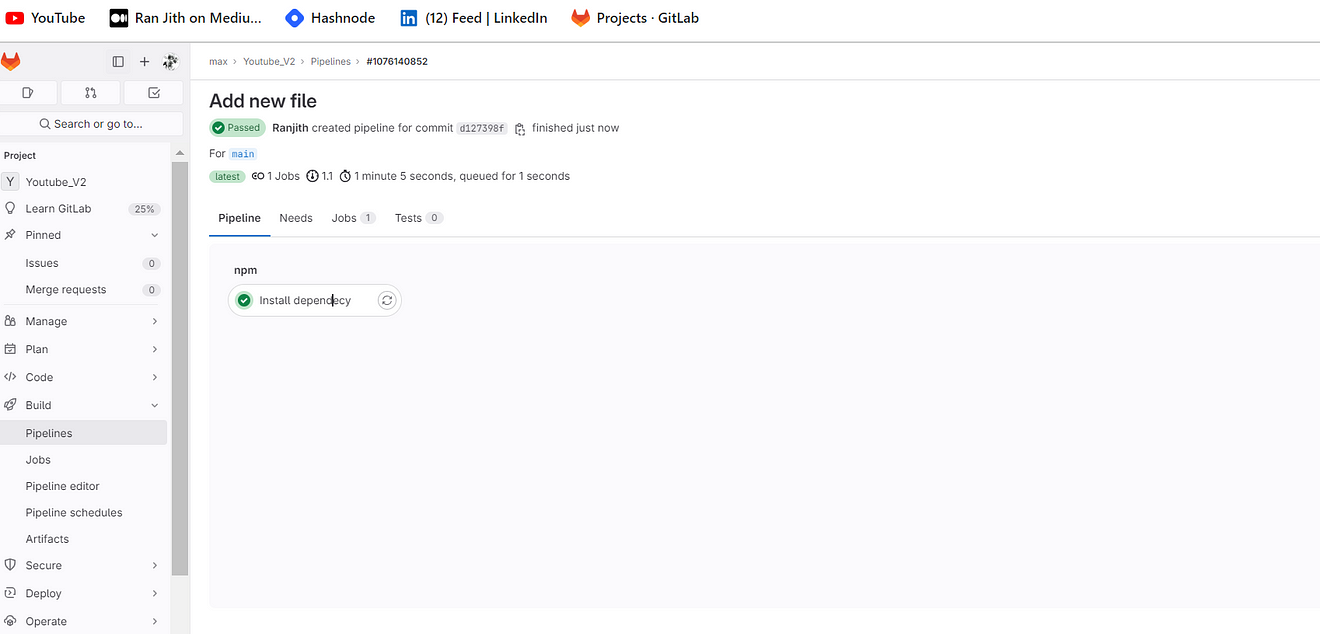
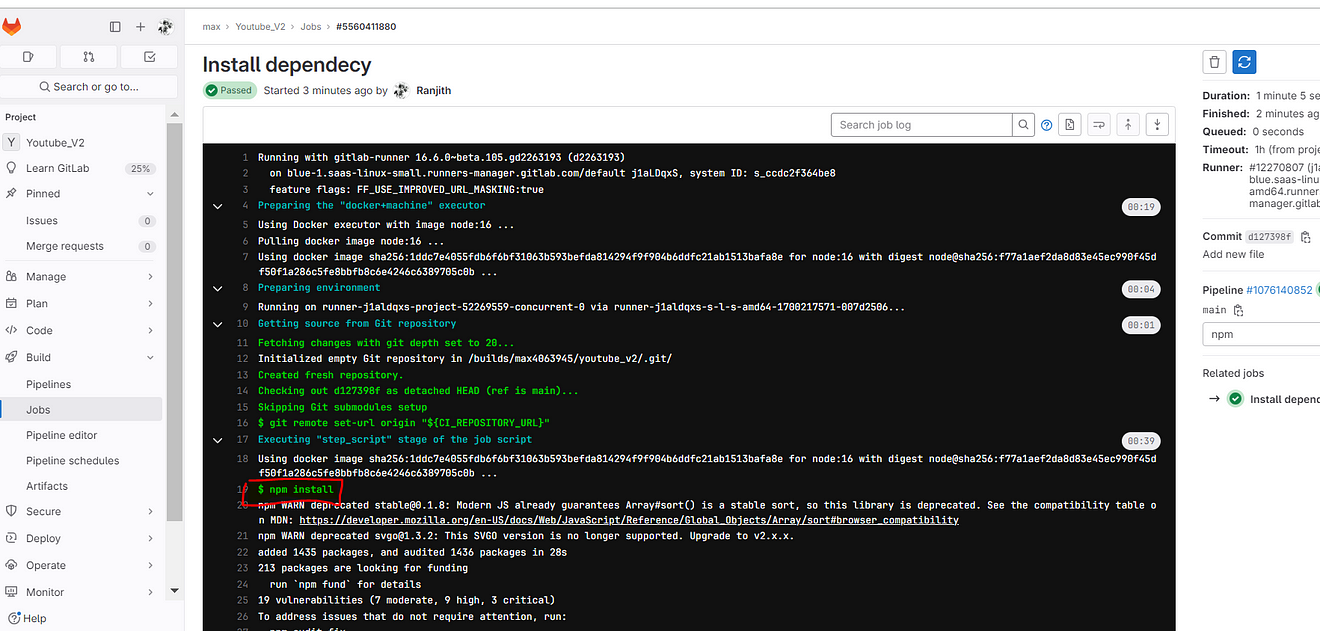
You will build output
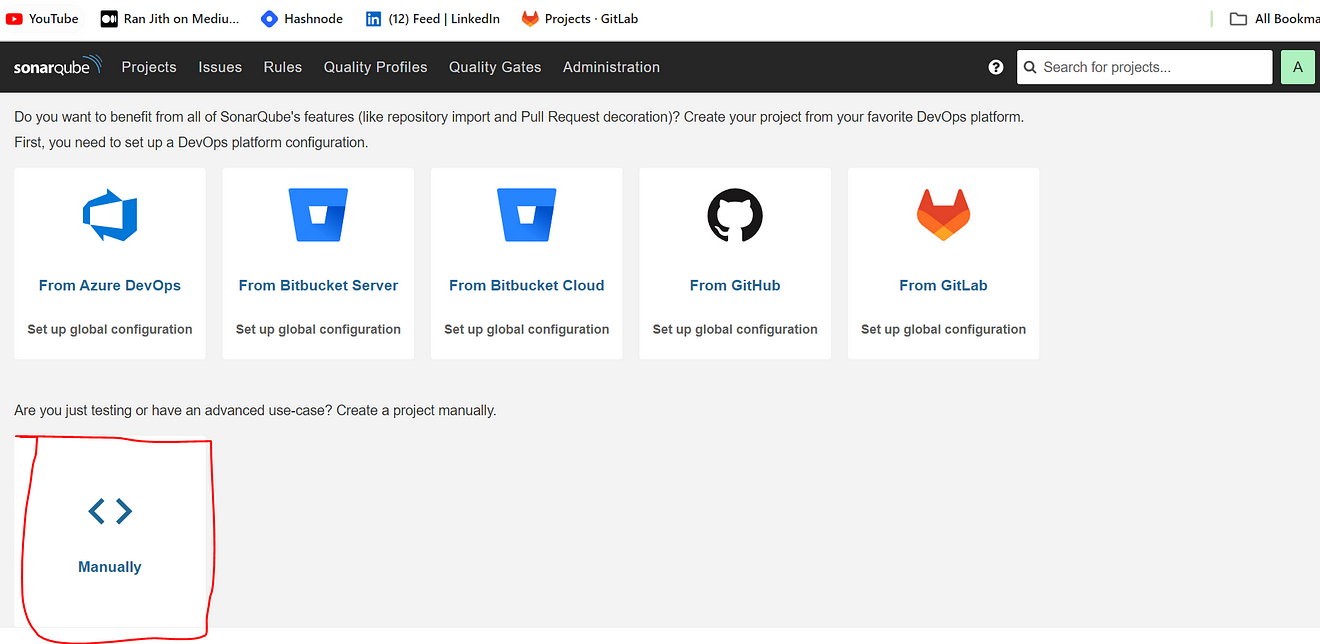
Now add the Sonarqube stage to the pipeline
Go to the Sonarqube dashboard and click on Manually.
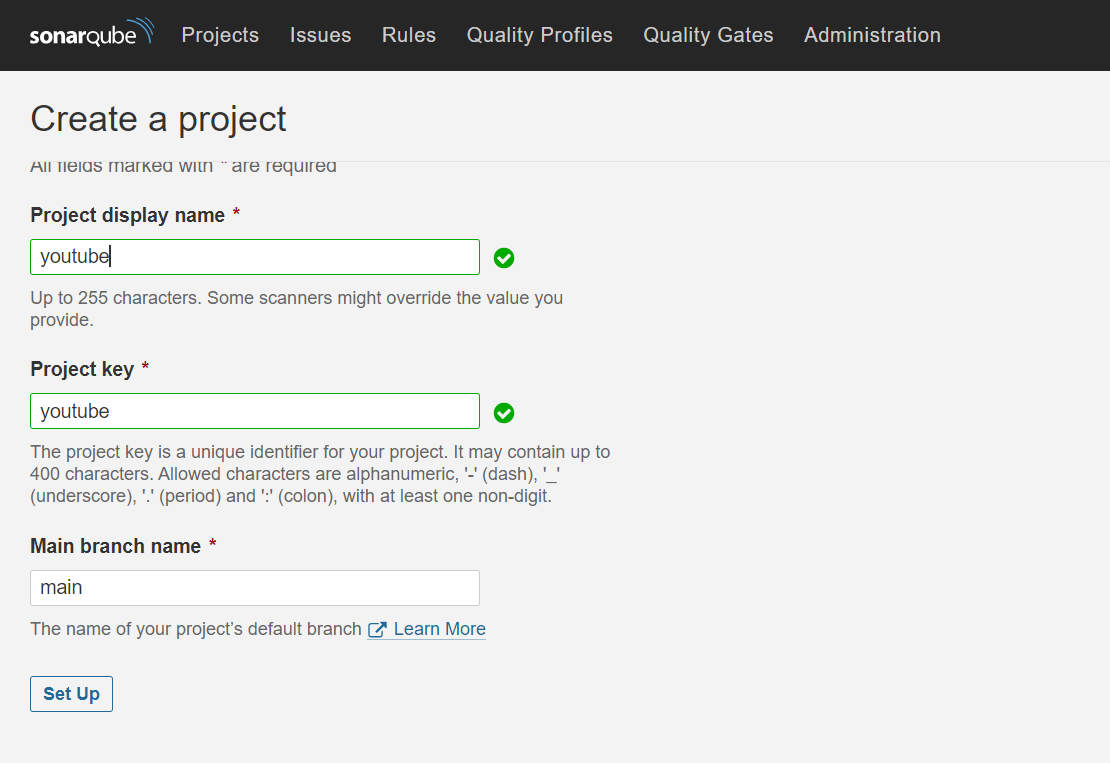
Provide the name of the Project and click on Setup
Select the CI tool as GitLab CI
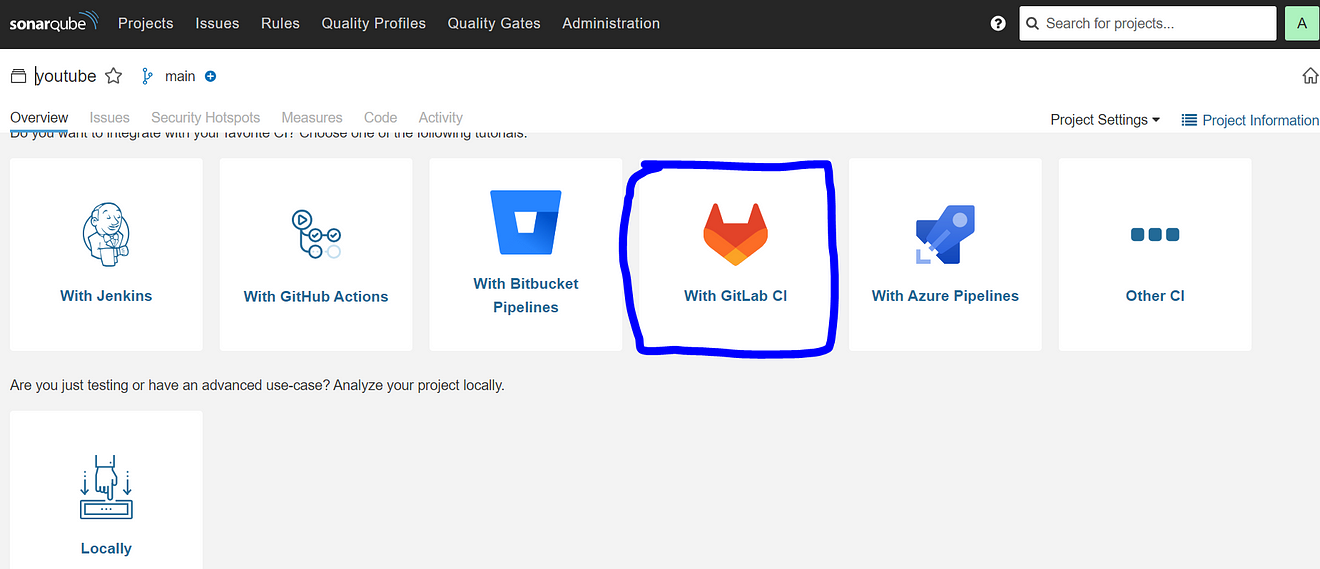
Select Other because we are using the JS App
It will provide code and we need to create a file inside our repo
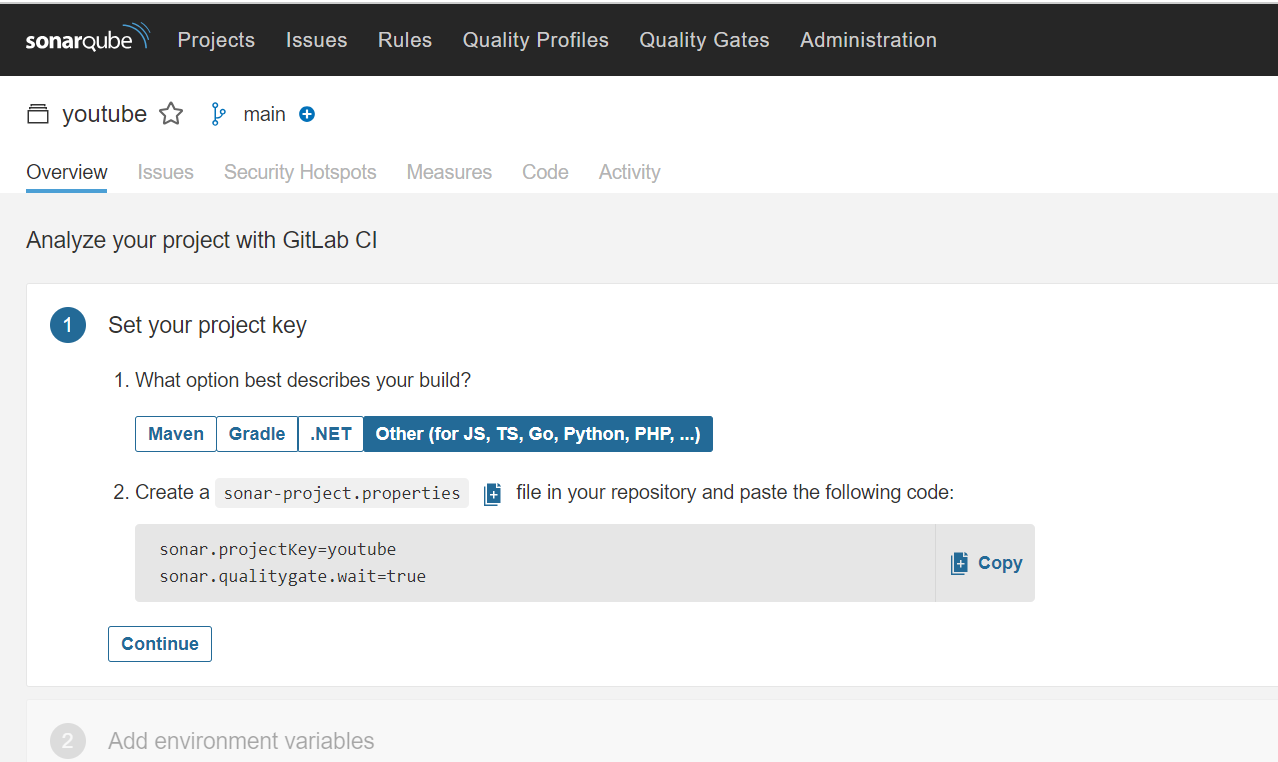
Go to Gitlab and click on + and Newfile
Filename is sonar-project.properties

Paste the content that you got from Sonarqube
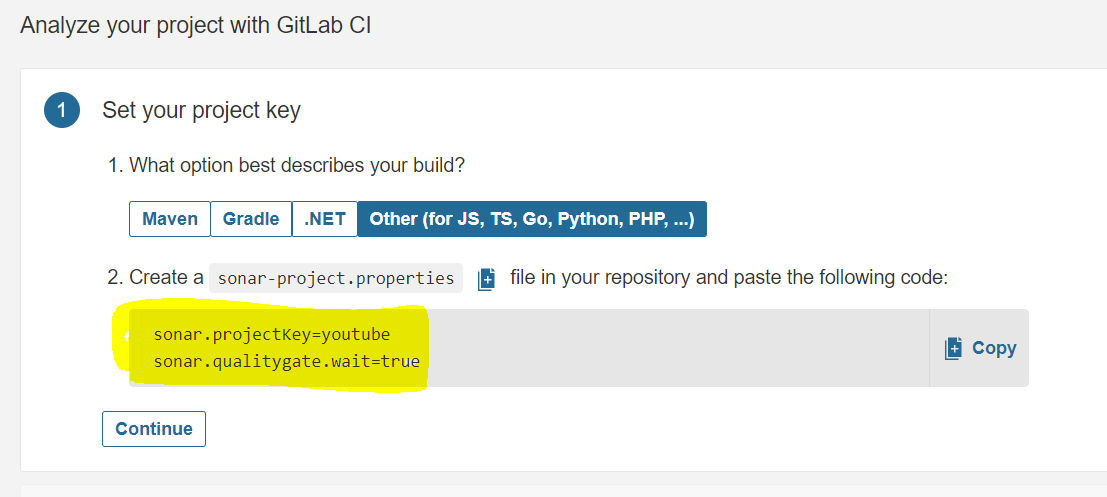
The file looks like this and click on commit changes
Go to Sonarqube and click on continue
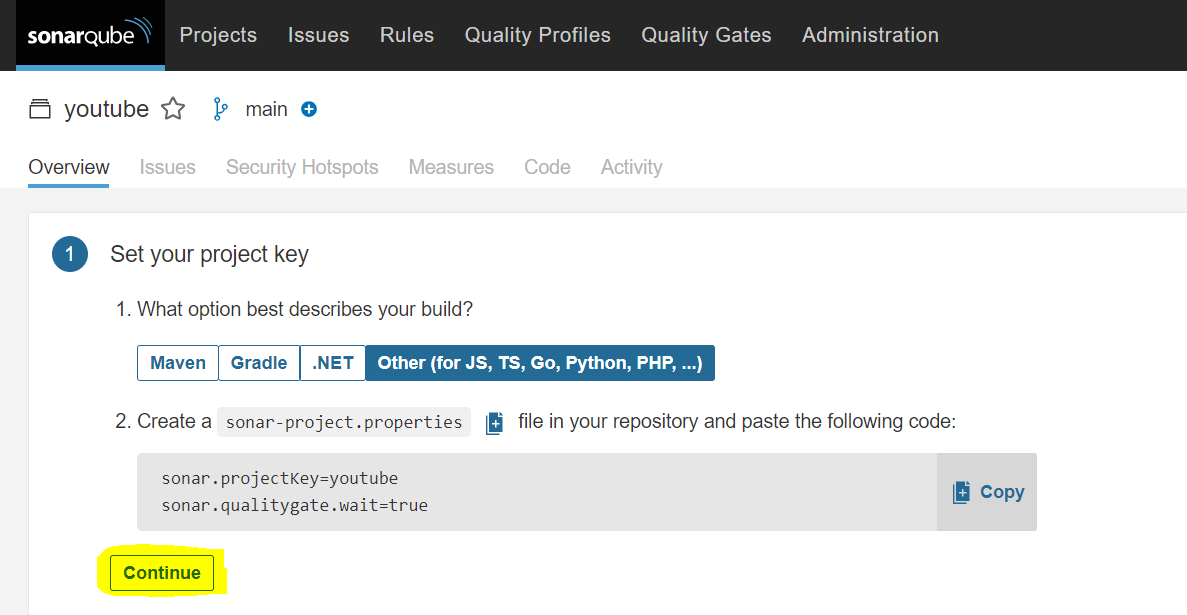
Now it will provide Variables to add to our GitLab
Step 4B: Add the required variables for the project.
Variables Generated
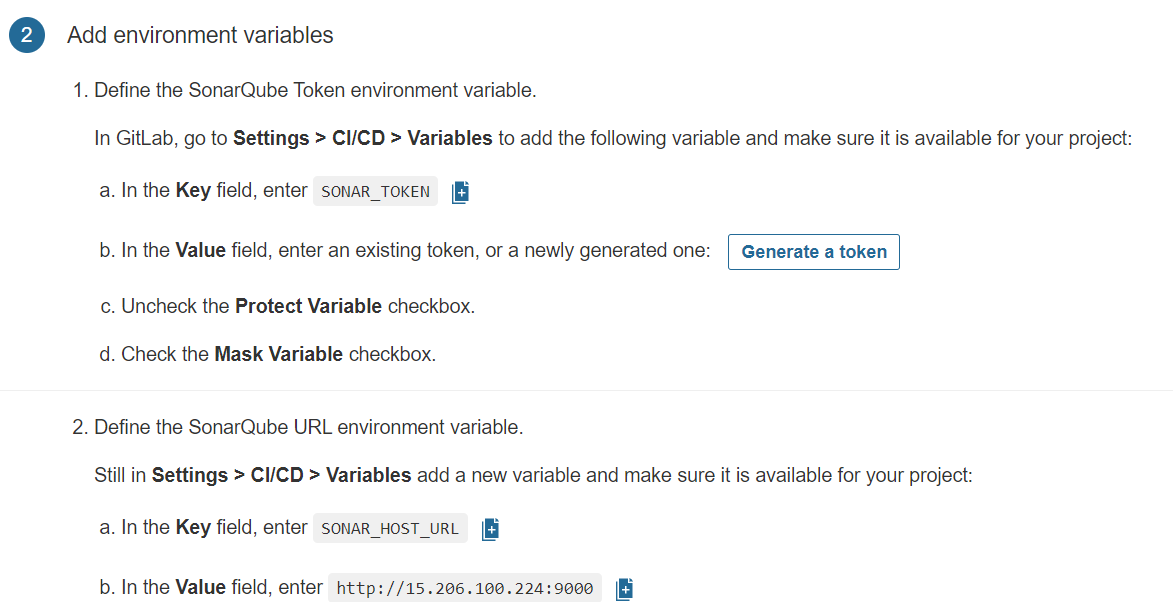
Now go to GitLab
Click on settings and CI/CD
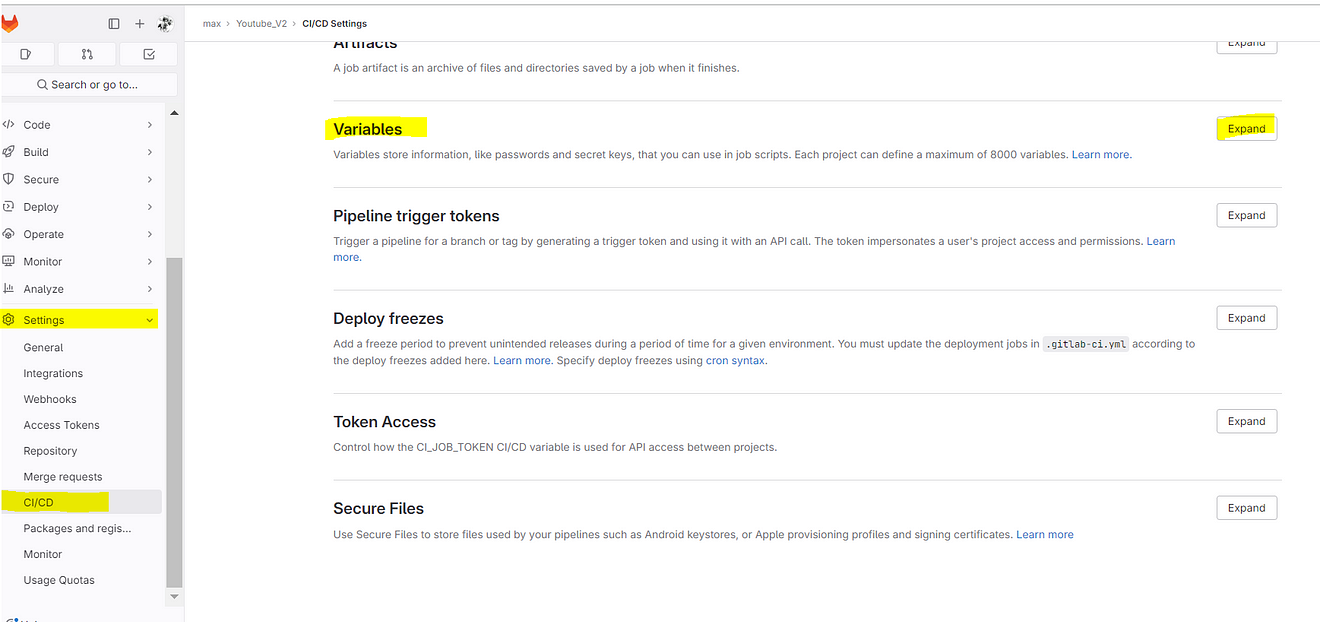
Click on Add variable

Now go back to Sonarqube and copy the Key
Click on Generate a token
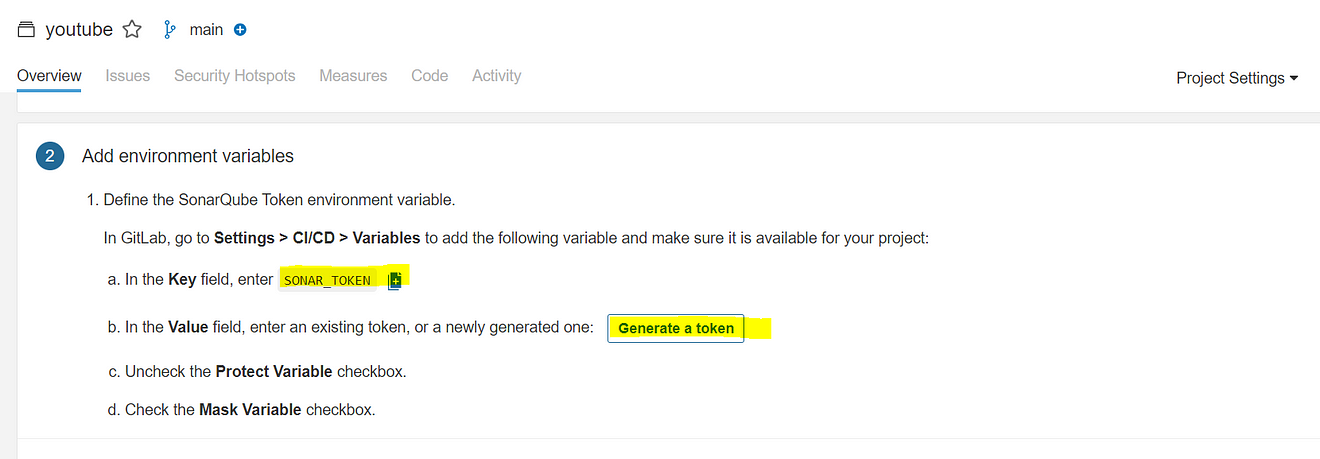
Again Click on Generate
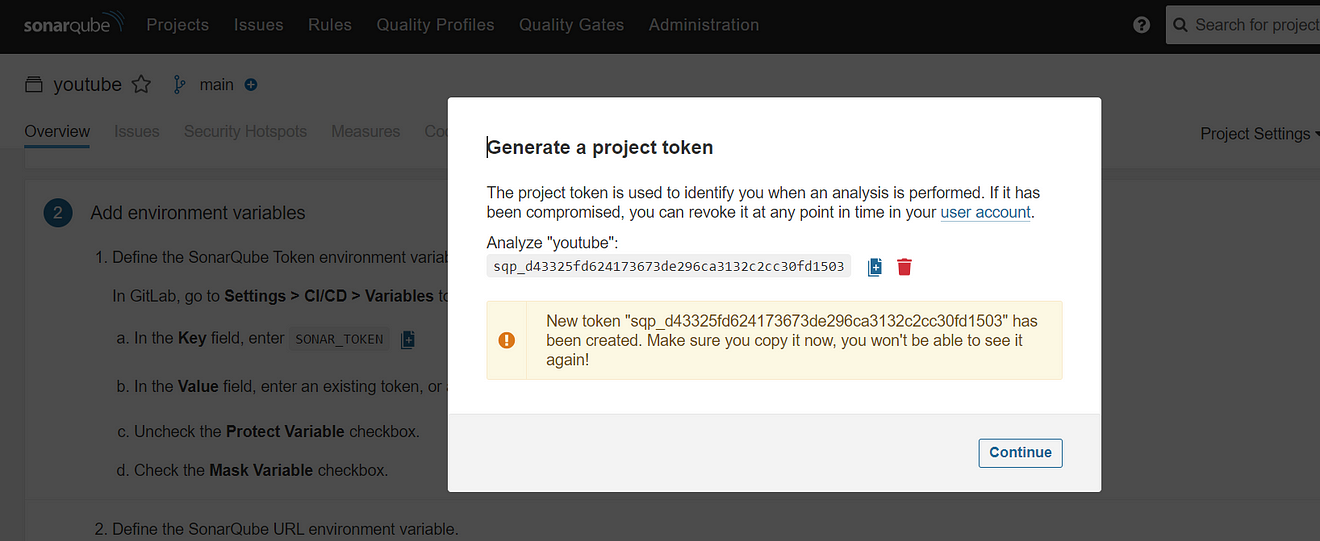
Now come back to GitLab and add them like the below image and click on add variable.
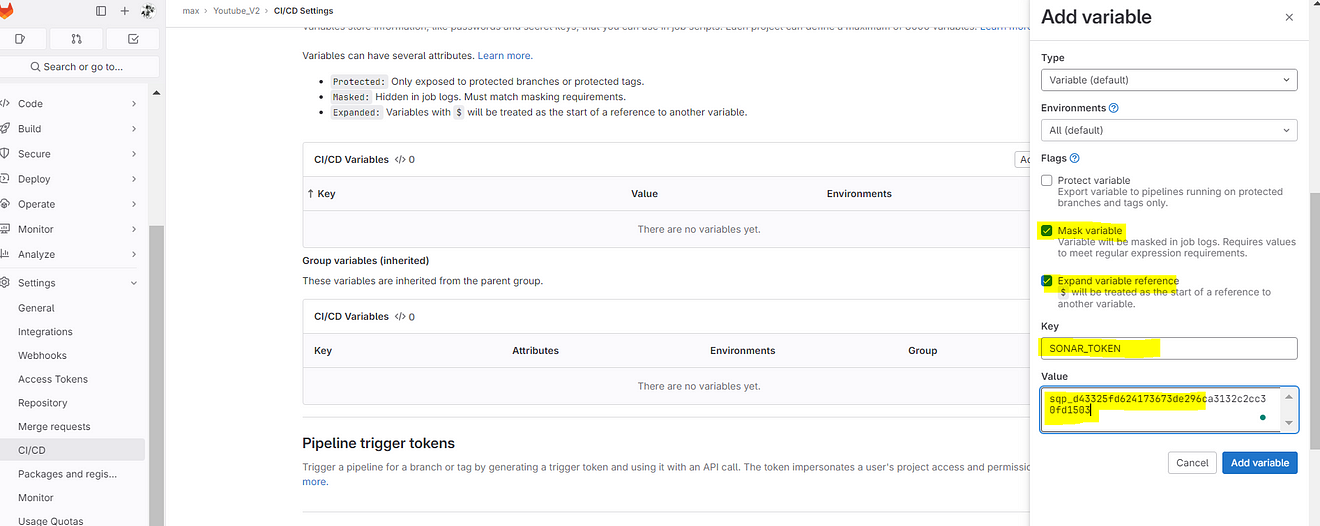
Sonar token is added

Now go to the Sonarqube Dashboard again
Let’s add another variable, copy them

Now go to GitLab and click on Add variable
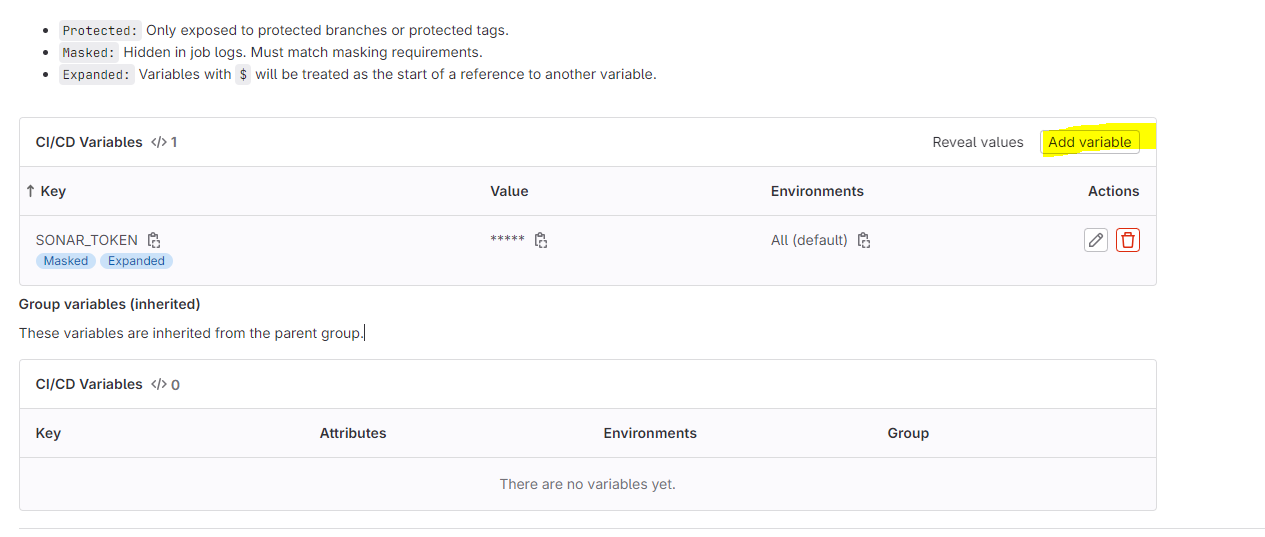
Add the copied values like the below image

Two variables were added.

Now go back to the Sonarqube Dashboard
Click on continue
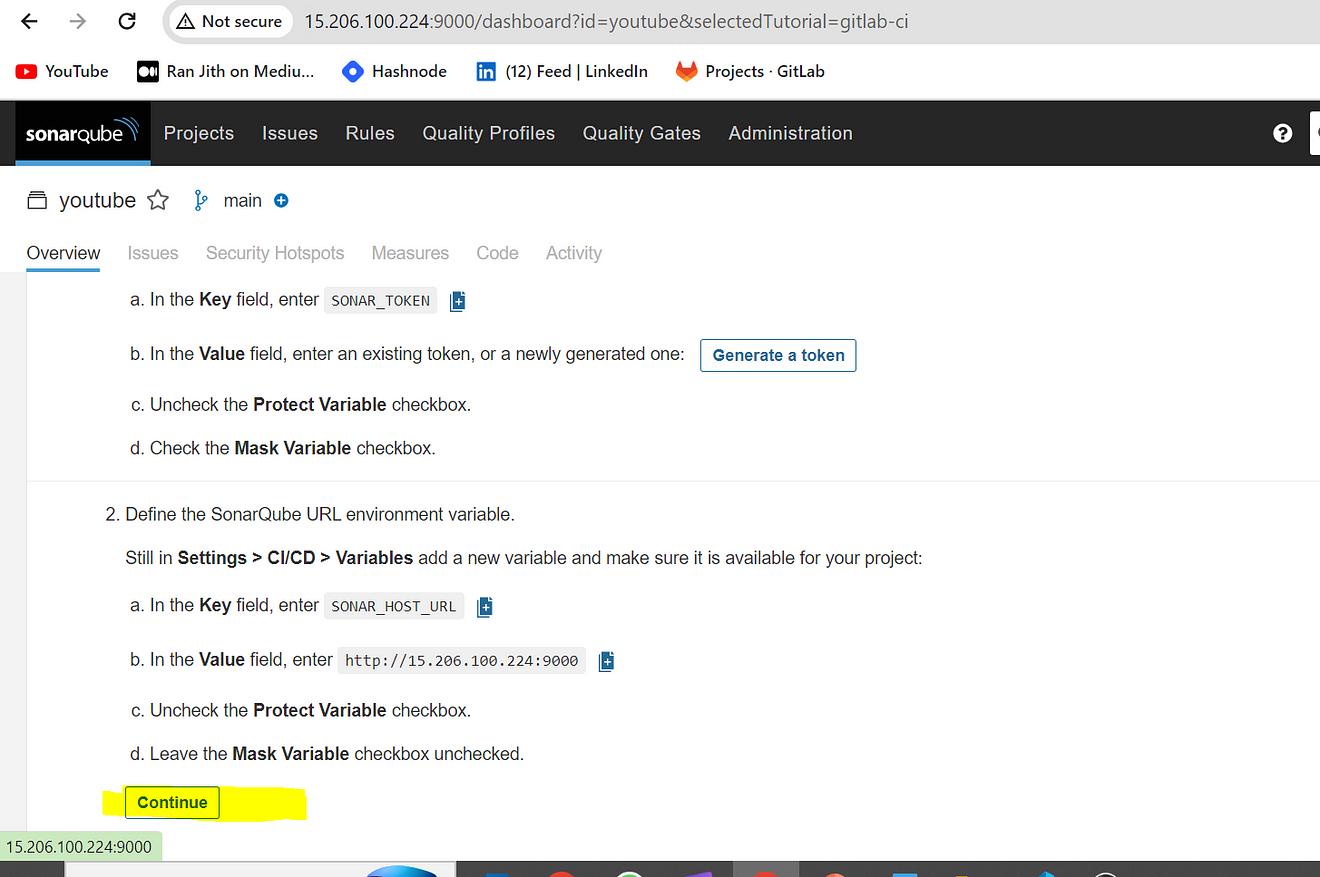
It will provide and CI configuration file copy it and use it inside our .gitlab-ci.yml file
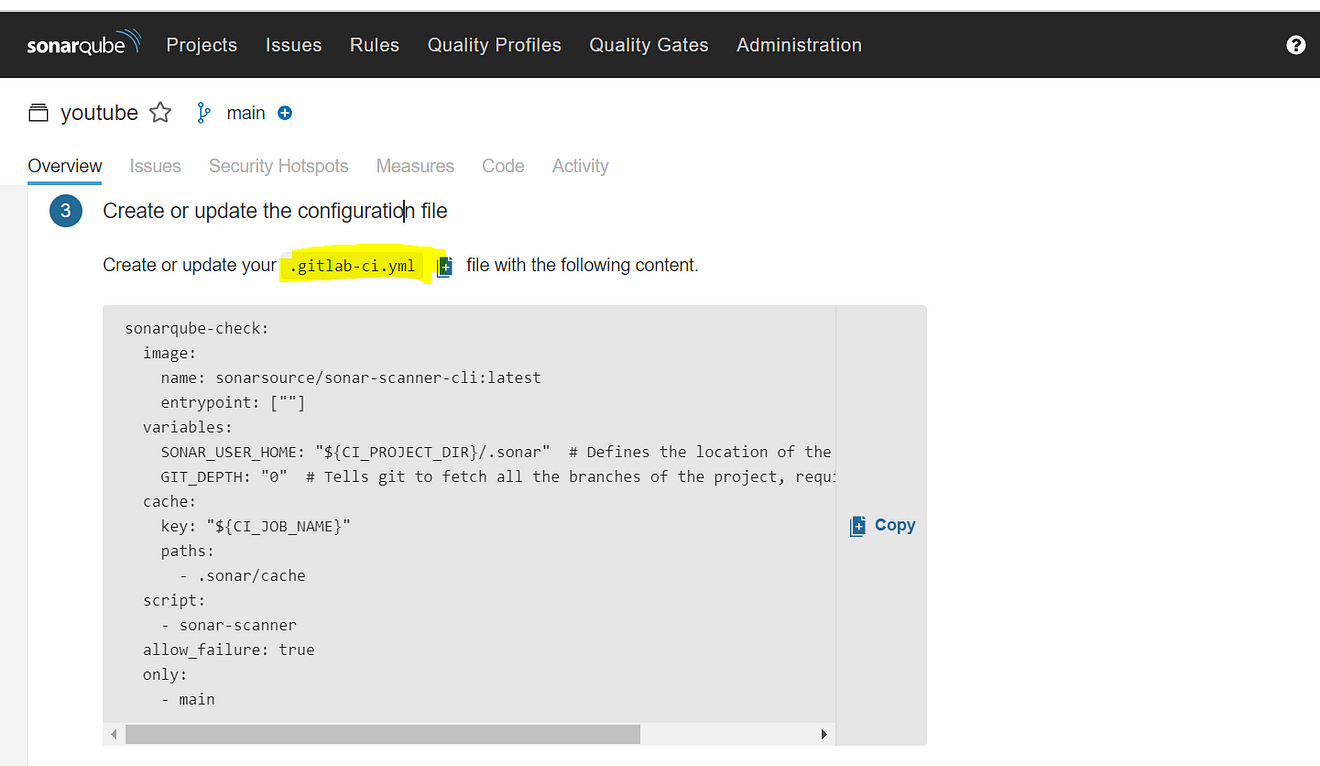
Now go back to GitLab and edit the .gitlab-ci.yml file
Full file (update with your content)
stages:
    - npm
    - sonar
    - trivy file scan

Install dependecy:
    stage: npm
    image:
        name: node:16
    script:
        - npm install

sonarqube-check:
  stage: sonar
  image:
    name: sonarsource/sonar-scanner-cli:latest
    entrypoint: [""]
  variables:
    SONAR_USER_HOME: "${CI_PROJECT_DIR}/.sonar"  # Defines the location of the analysis task cache
    GIT_DEPTH: "0"  # Tells git to fetch all the branches of the project, required by the analysis task
  cache:
    key: "${CI_JOB_NAME}"
    paths:
      - .sonar/cache
  script:
    - sonar-scanner
  allow_failure: true
  only:
    - main

Trivy file scan:
  stage: trivy file scan
  image:
    name: aquasec/trivy:latest
    entrypoint: [""]
  script:
    - trivy fs .
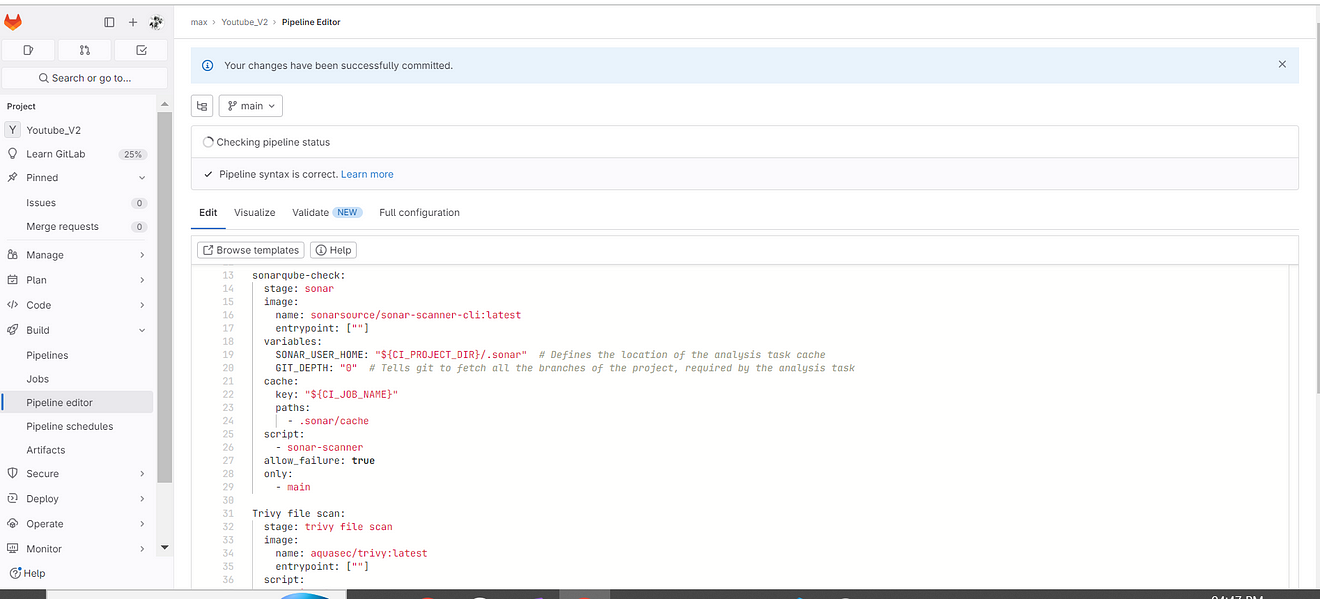
Commit changes and go to pipeline stages

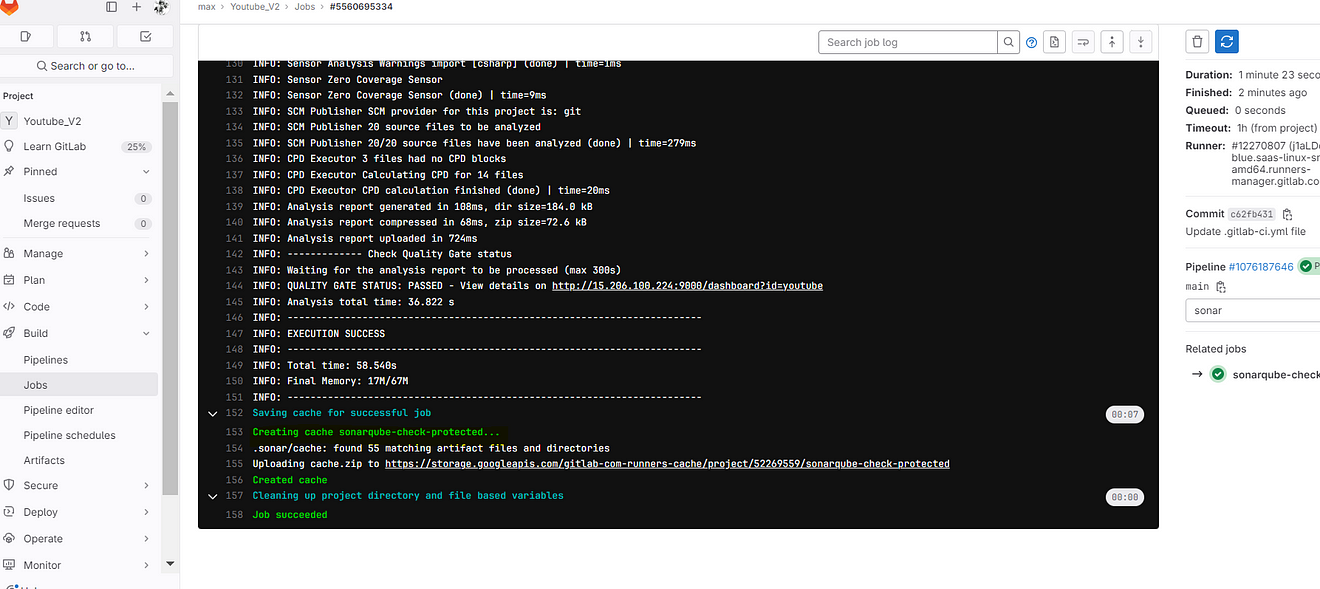
Now click on Sonarqube-check
output
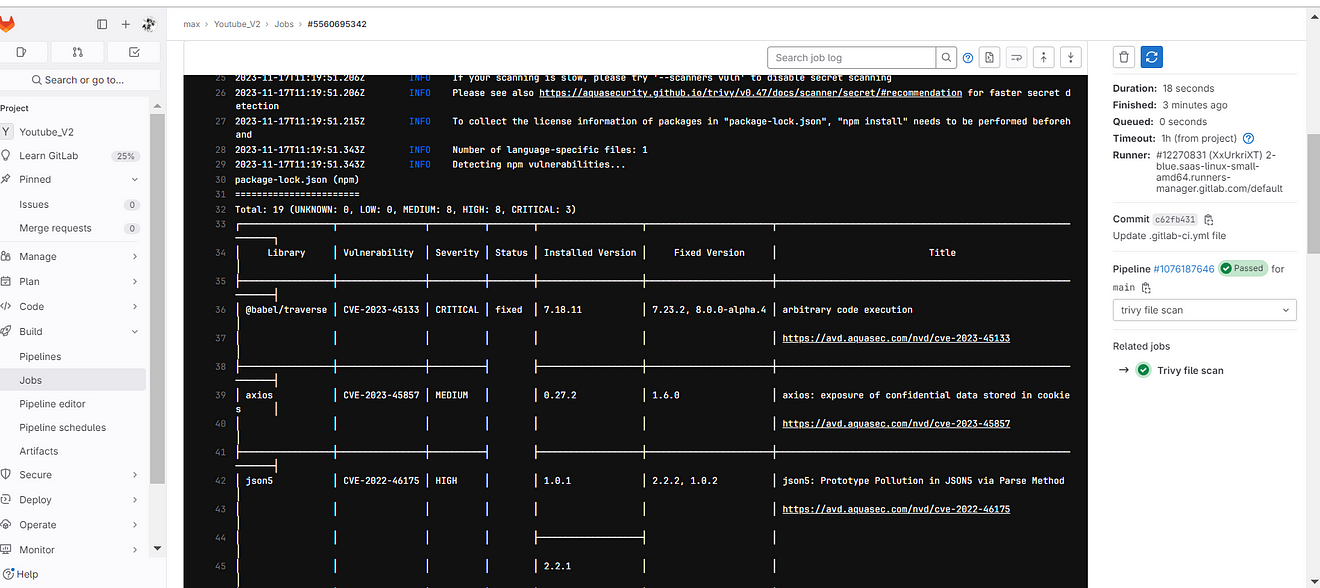
Click on the Trivy file scan
output
Add the Docker build and push stage
Before that Add docker credentials to GitLab Variables as secrets.
Go to the docker hub and create a Personal Access token
Click on your profile name and Account Settings

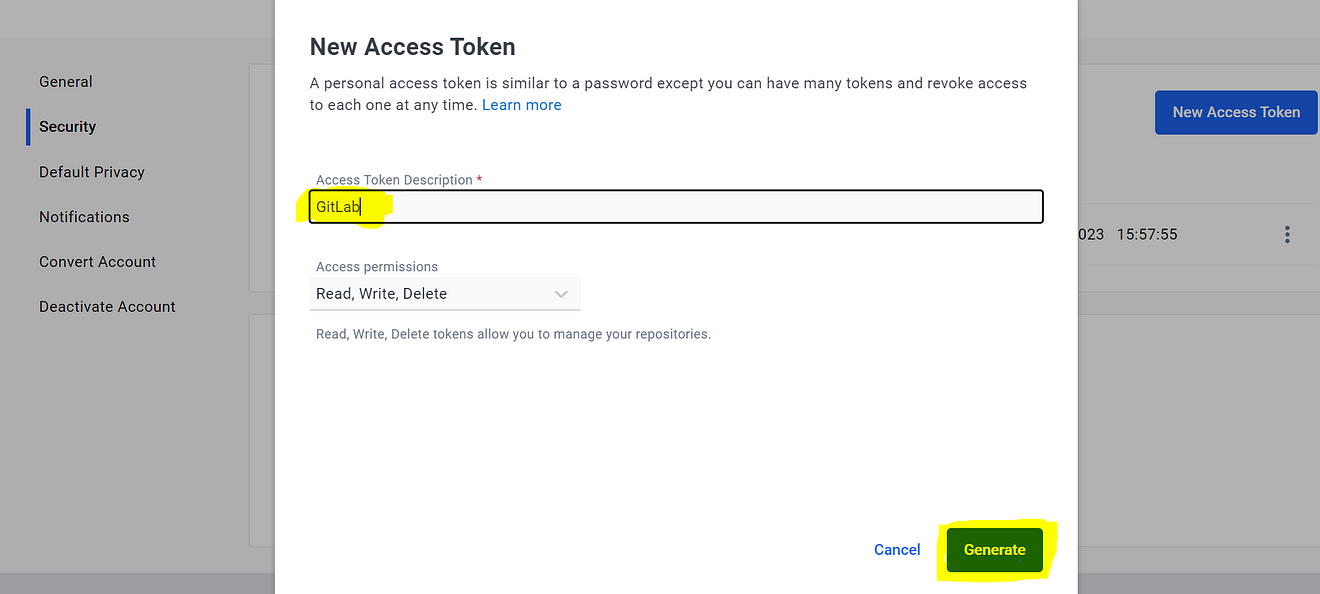
Now click on Security → New Access Token
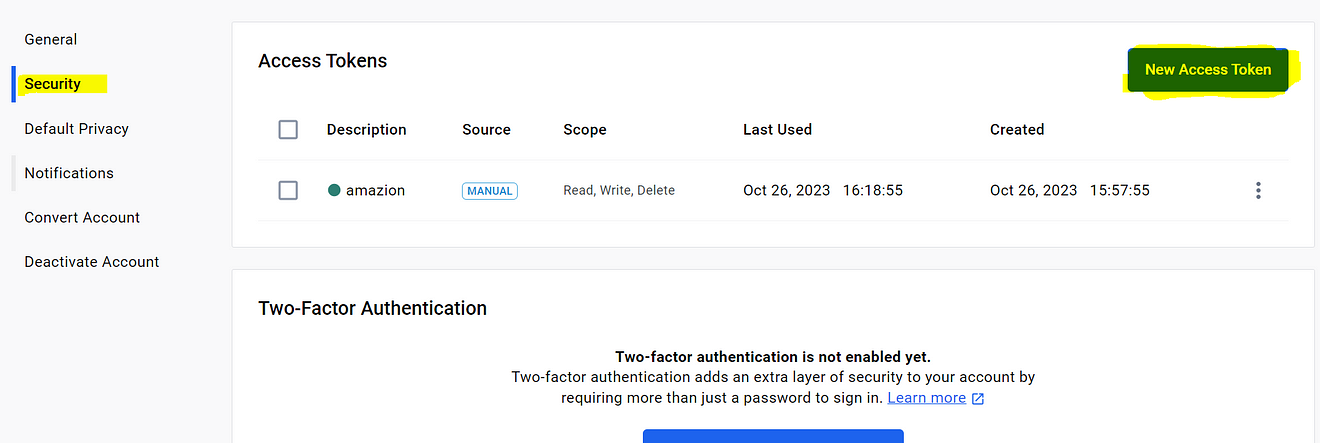
Provide a name → Generate
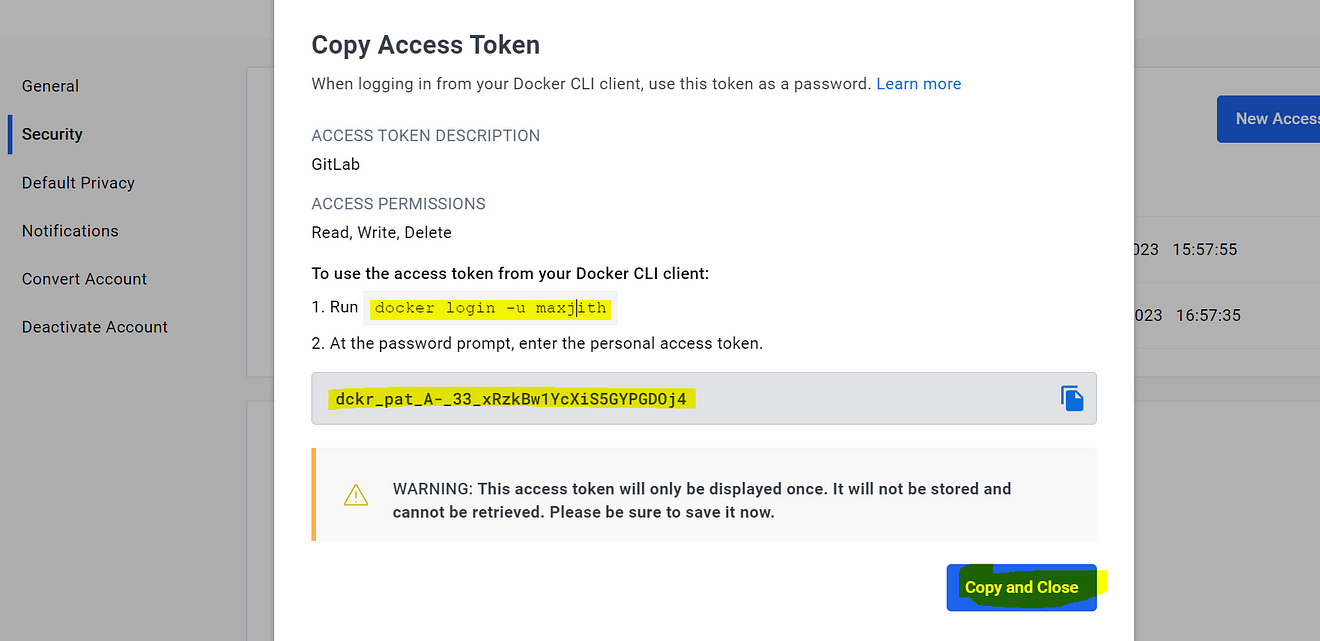
Now copy the token and keep it safe
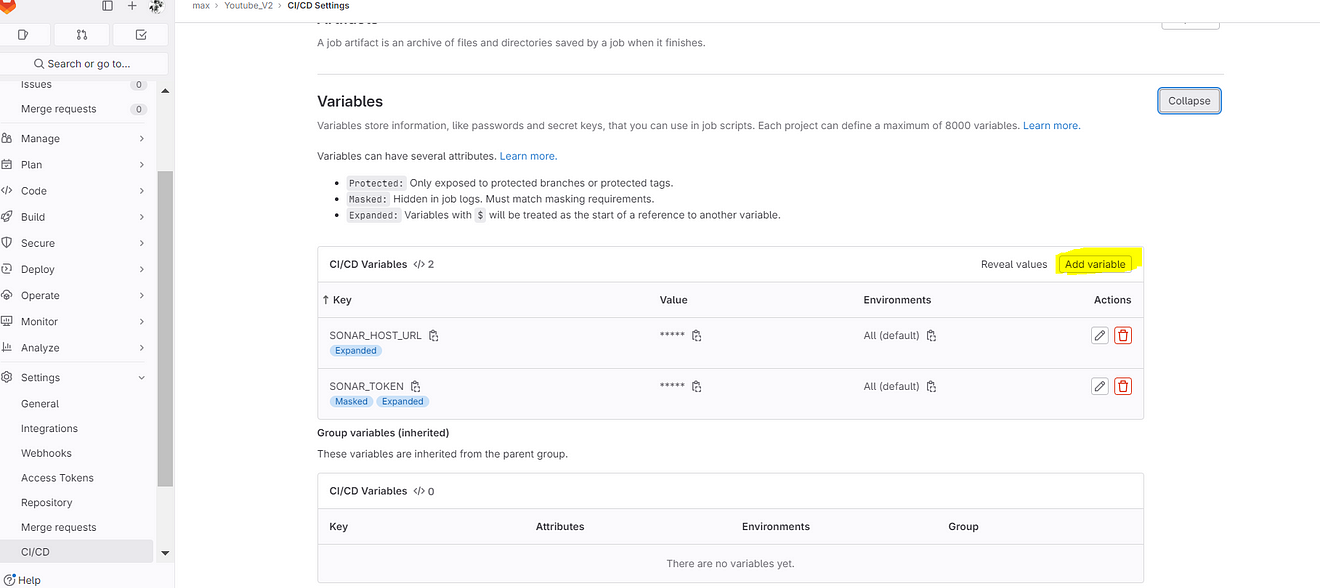
Now go back to Gitlab
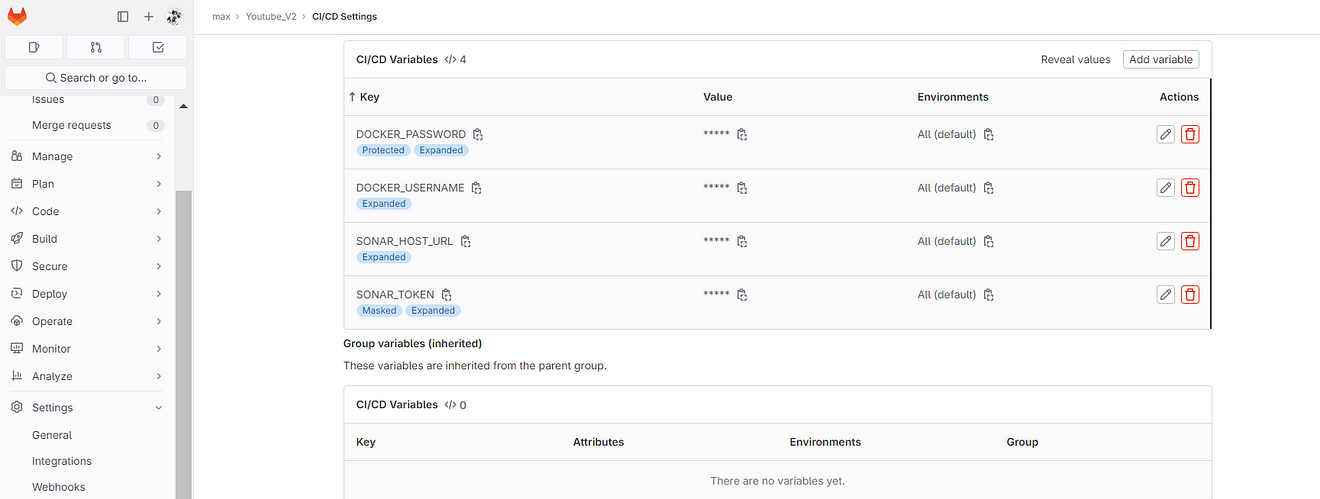
Click on settings and CI/CD Add Variable
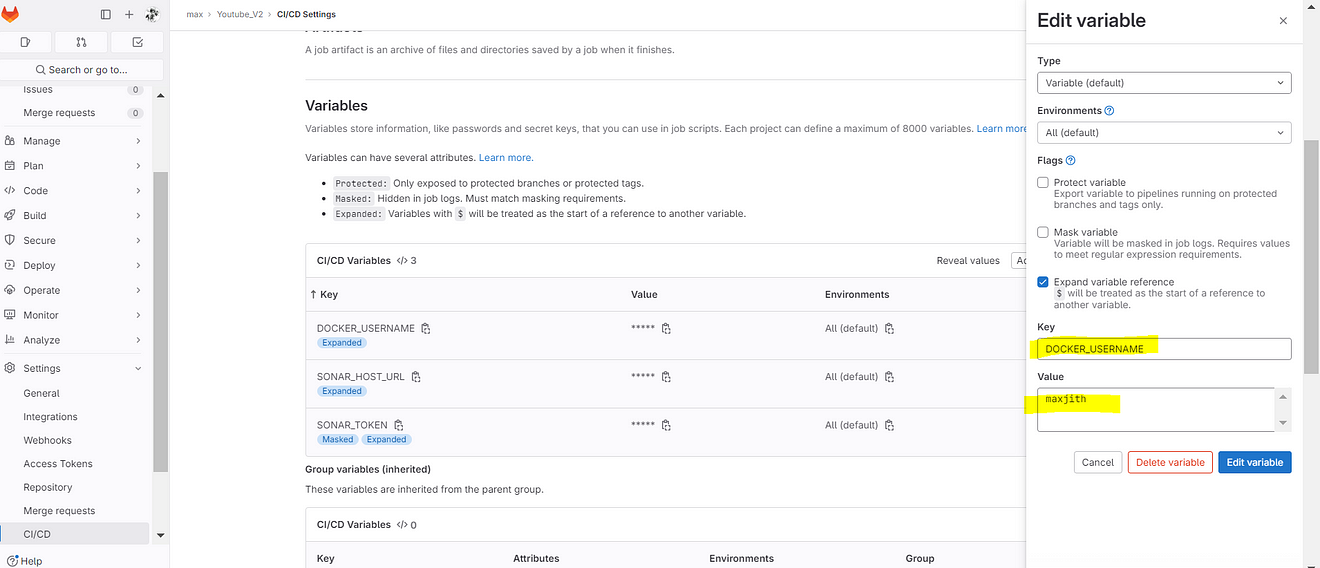
Use your DockerHub username in value and Add variable
Key DOCKER_USERNAME
Key DOCKER_PASSWORD
For value use the Generated Personal Access token and add a variable.
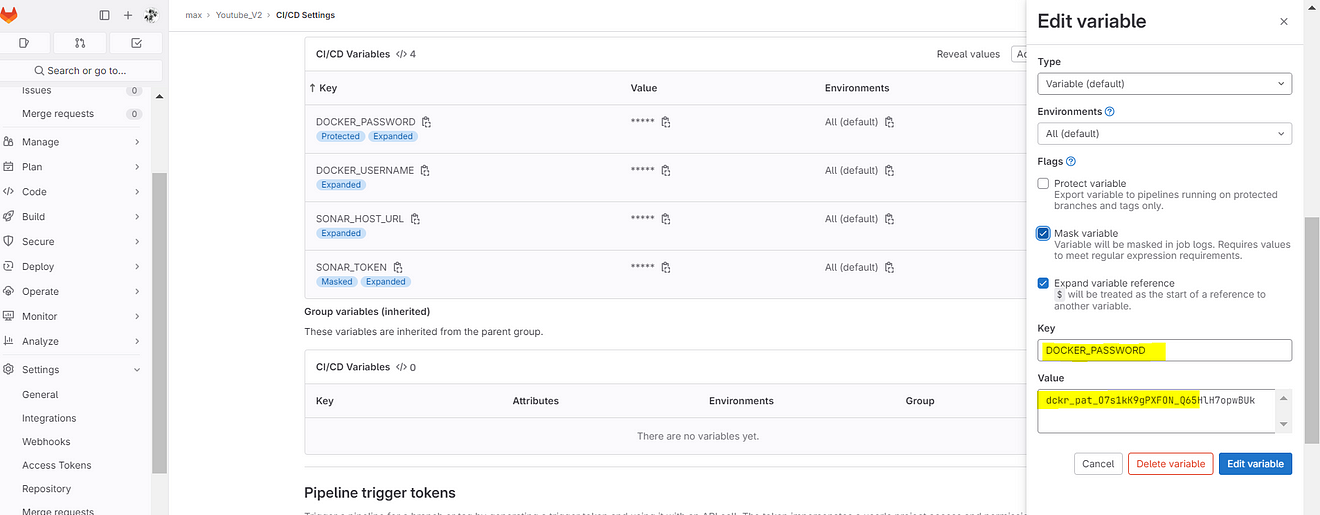
Variables added.
Now add the below stage to the Configuration .gitlab-ci.yml file
Added Docker and Trivy image scan stages
stages:
    - npm
    - sonar
    - trivy file scan
    - docker
    - trivy image scan

Install dependecy:
    stage: npm
    image:
        name: node:16
    script:
        - npm install

sonarqube-check:
  stage: sonar
  image:
    name: sonarsource/sonar-scanner-cli:latest
    entrypoint: [""]
  variables:
    SONAR_USER_HOME: "${CI_PROJECT_DIR}/.sonar"  # Defines the location of the analysis task cache
    GIT_DEPTH: "0"  # Tells git to fetch all the branches of the project, required by the analysis task
  cache:
    key: "${CI_JOB_NAME}"
    paths:
      - .sonar/cache
  script:
    - sonar-scanner
  allow_failure: true
  only:
    - main

Trivy file scan:
  stage: trivy file scan
  image:
    name: aquasec/trivy:latest
    entrypoint: [""]
  script:
    - trivy fs .

Docker build and push:
  stage: docker
  image:
    name: docker:latest
  services:
    - docker:dind
  script:
    - docker build --build-arg REACT_APP_RAPID_API_KEY=f0ead79813mshb0aa7ddf114a7dap1adb3djsn483b017de1a9 -t youtubev1 .
    - docker tag youtubev2 maxjith/youtubev2:latest
    - docker login -u $DOCKER_USERNAME -p $DOCKER_PASSWORD
    - docker push maxjith/youtubev2:latest

Scan image:
  stage: trivy image scan
  image:
    name: aquasec/trivy:latest
    entrypoint: [""]
  script:
    - trivy image maxjith/youtubev2:latest
Added stages
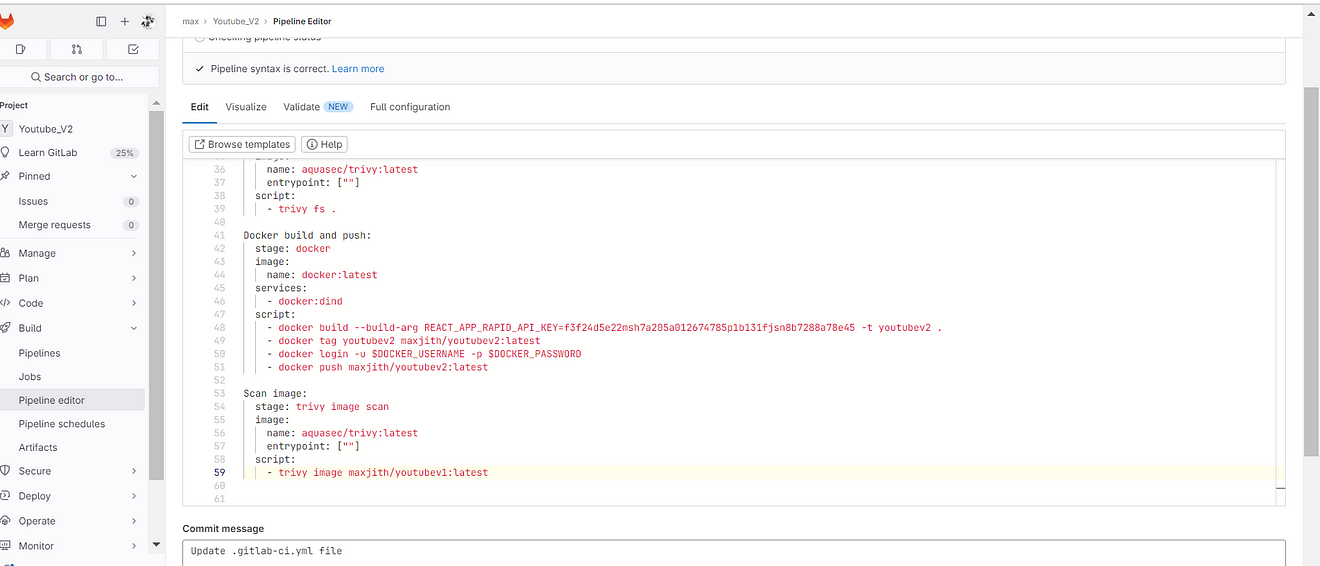
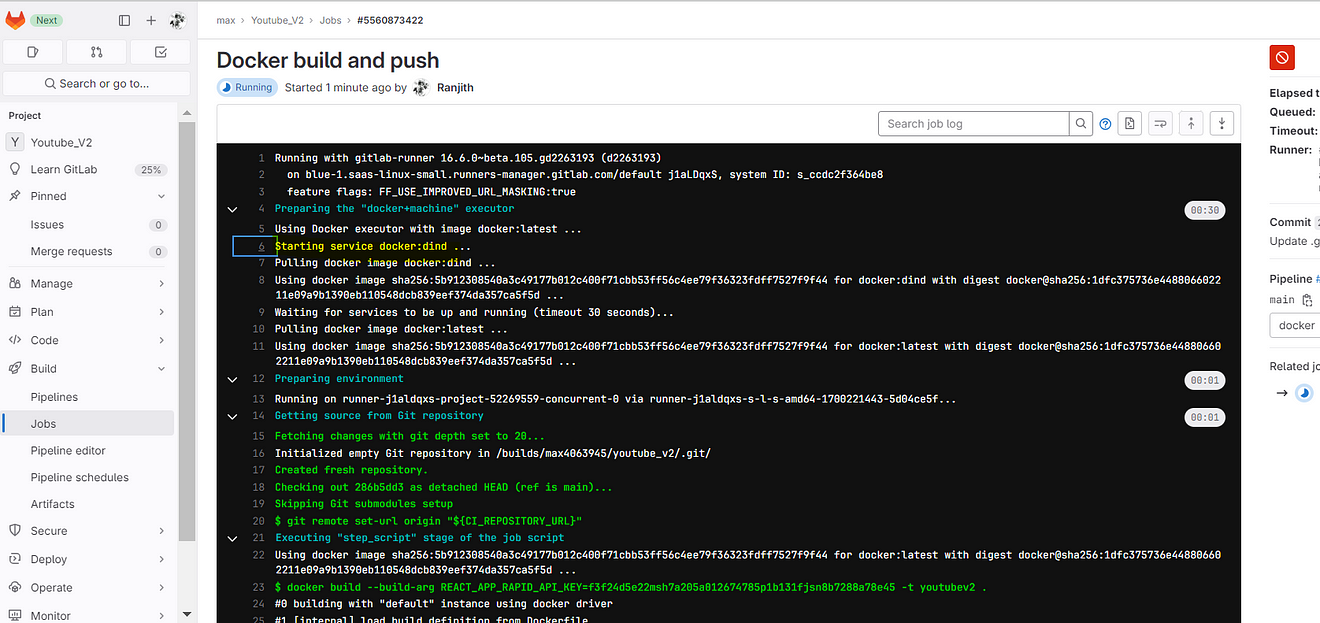
Commit changes and it will automatically start building.
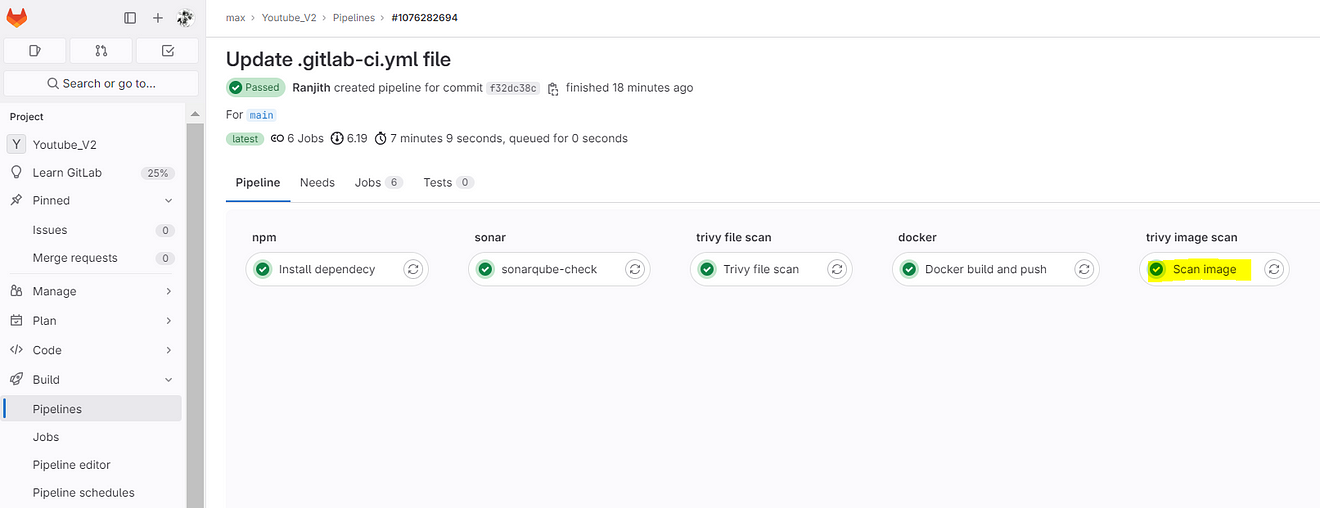
Go to Pipelines view

Now click on Docker build and push
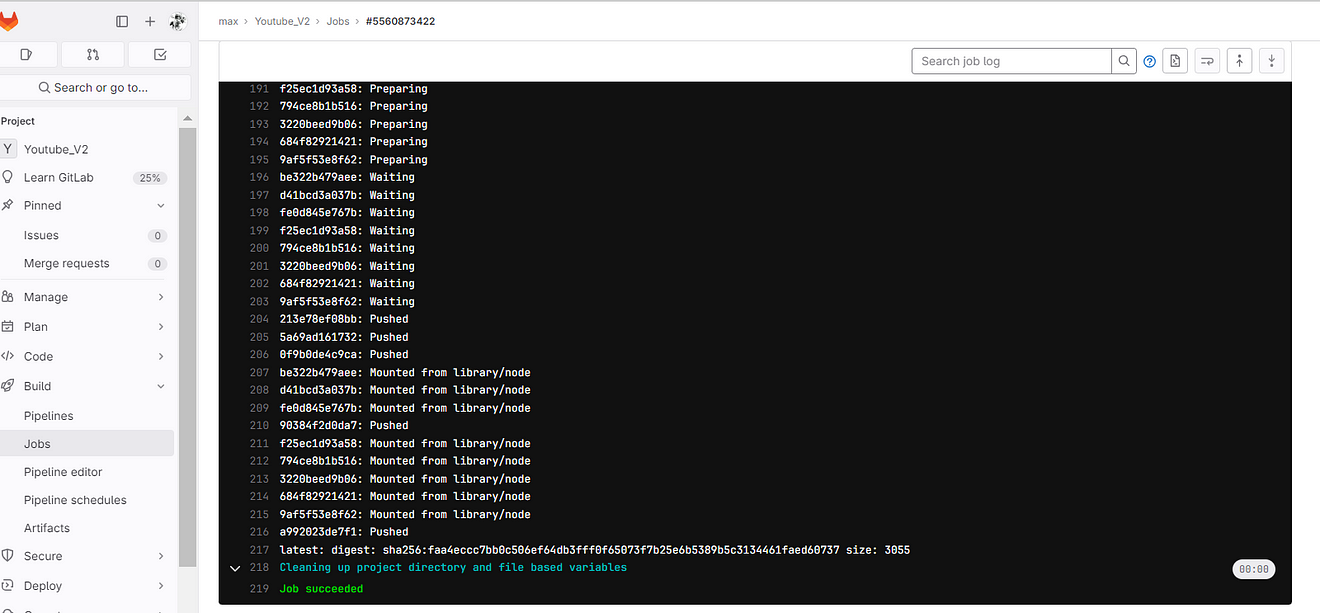
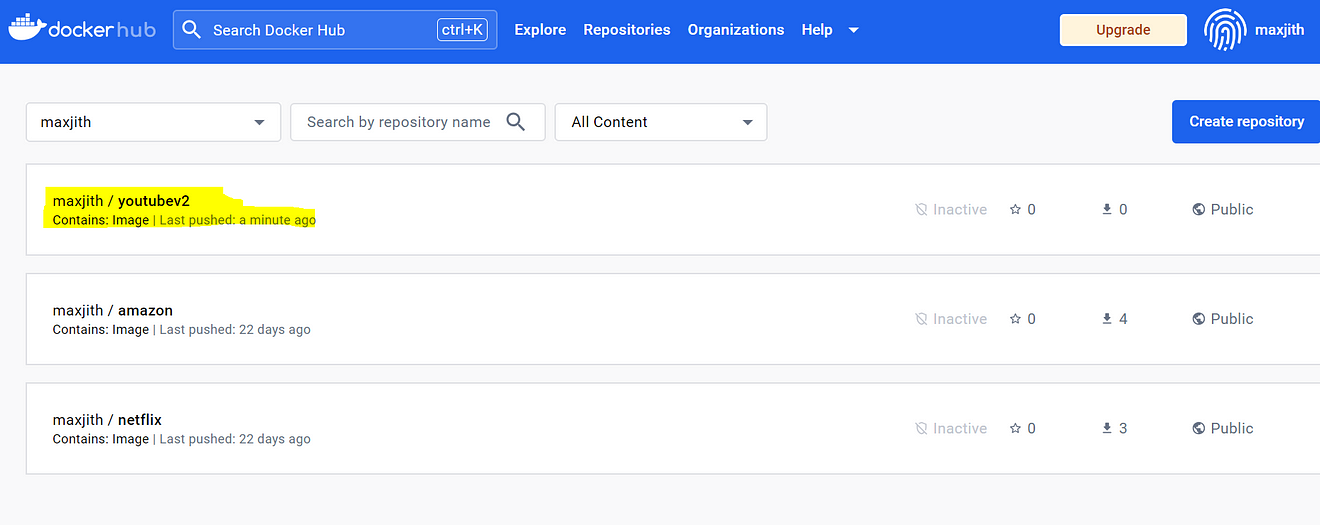
Go to Dockerhub and see the image
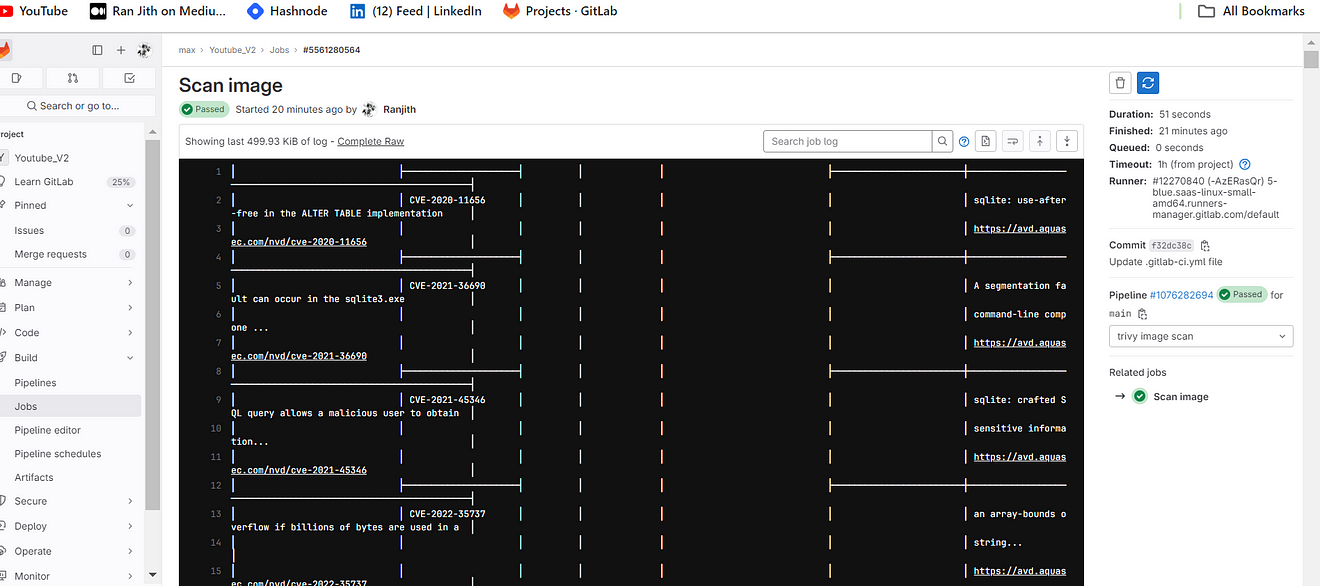
Now come back to GitLab and click on Trivy image scan
Output raw
Step 5: Install Gitlab Runner on Ec2
Go to GitLab and Click on Settings and CI/CD
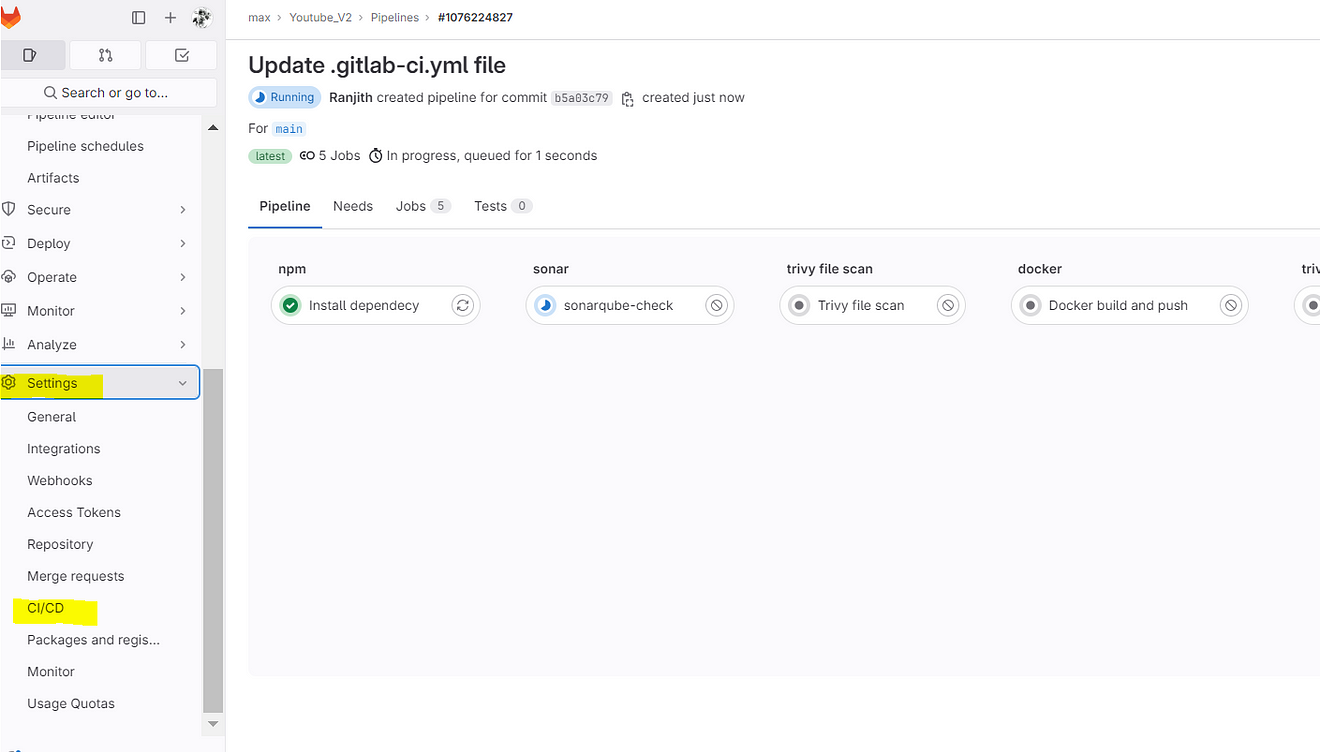
Click on Expand at Runners
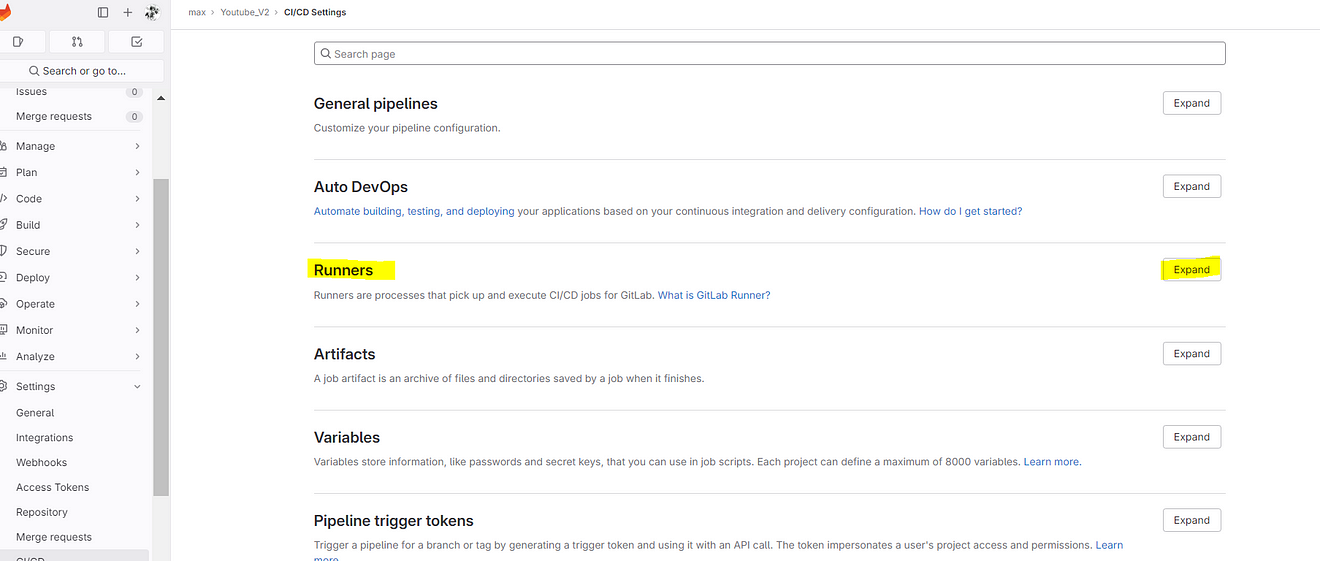
Click on Three dots and then click on Show Runner installation
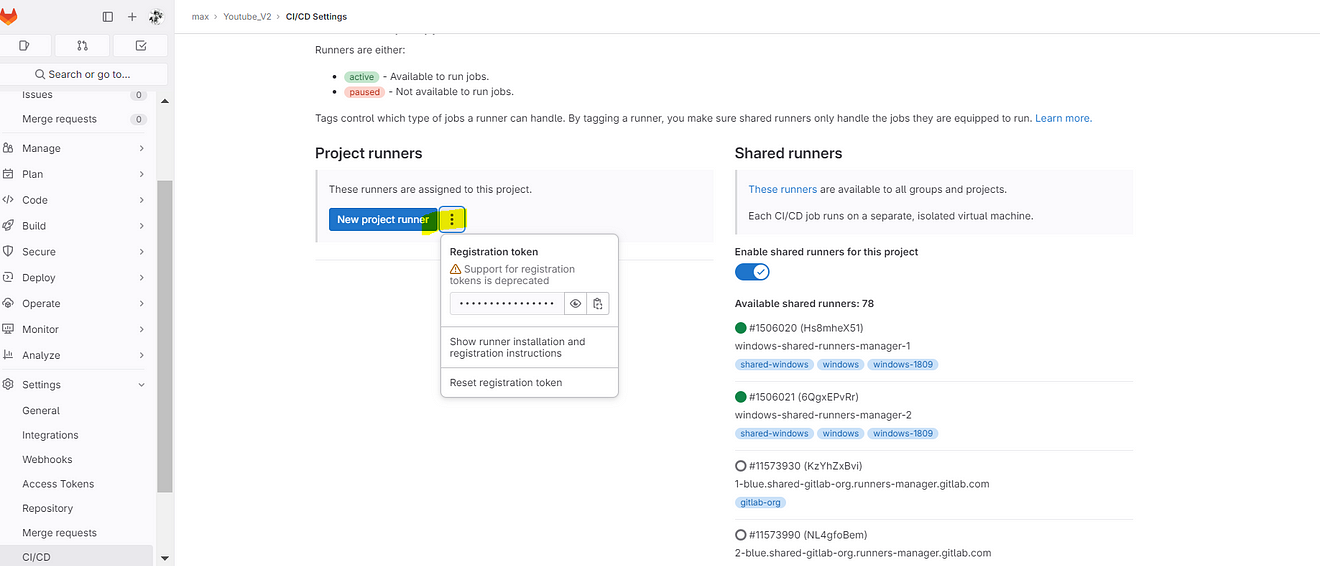
Click on Linux and amd64 and copy the commands
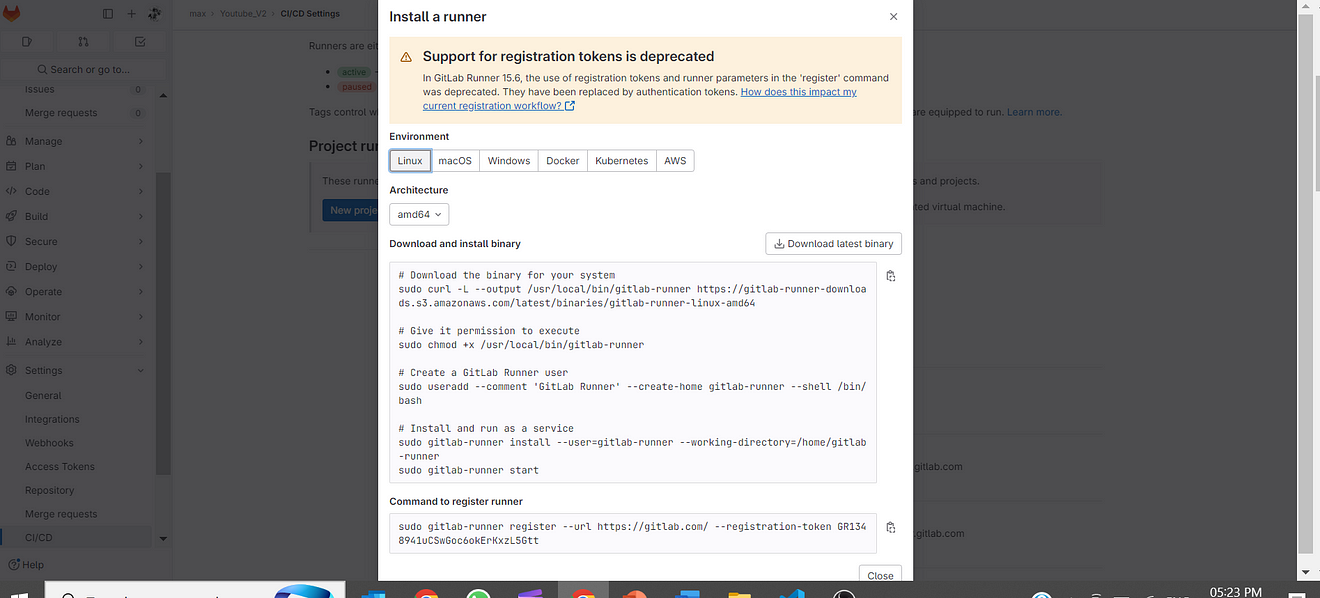
Now come back to server Putty or Mobaxtreme
Create a new file
sudo vi gitlab-runner-installation
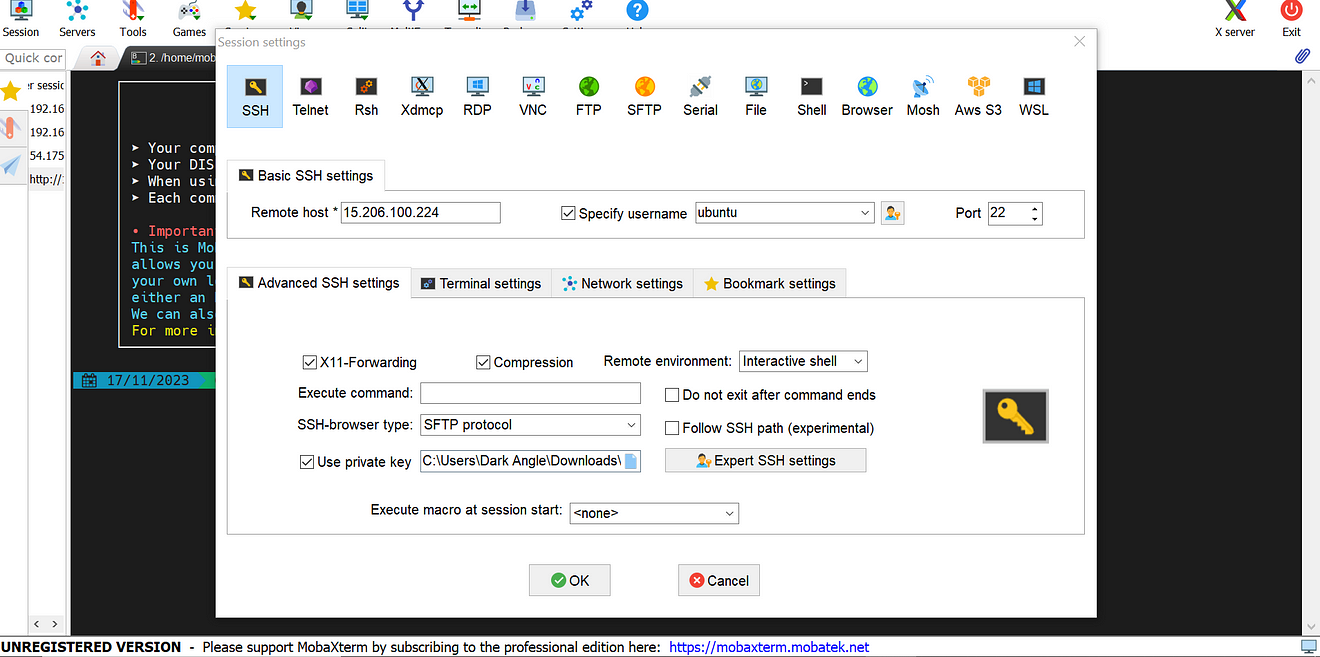
Paste the below commands into it
Paste the below commands into it

Provide executable permissions and run the script
sudo chmod +x <file-name>
./<file-name>

Installation completed

Start the GitLab runner
sudo gitlab-runner start

Now run the below command or your command to register the runner
Update the token is enough

sudo gitlab-runner register --url https://gitlab.com/ --registration-token <token>
Provide the details for registering the runner
Provide Enter for GitLab.com
For token we already added with token, so click on Enter again
Description as your wish
Tags also and you can use multiple tags by providing a comma after each tga
Maintenance note is just optional
For executors use Shell

Runner added successfully.
Start the GitLab runner
sudo gitlab-runner start

Run the GitLab runner
sudo gitlab-runner run

Go to GitLab and refresh the page once or click on Enable for this project
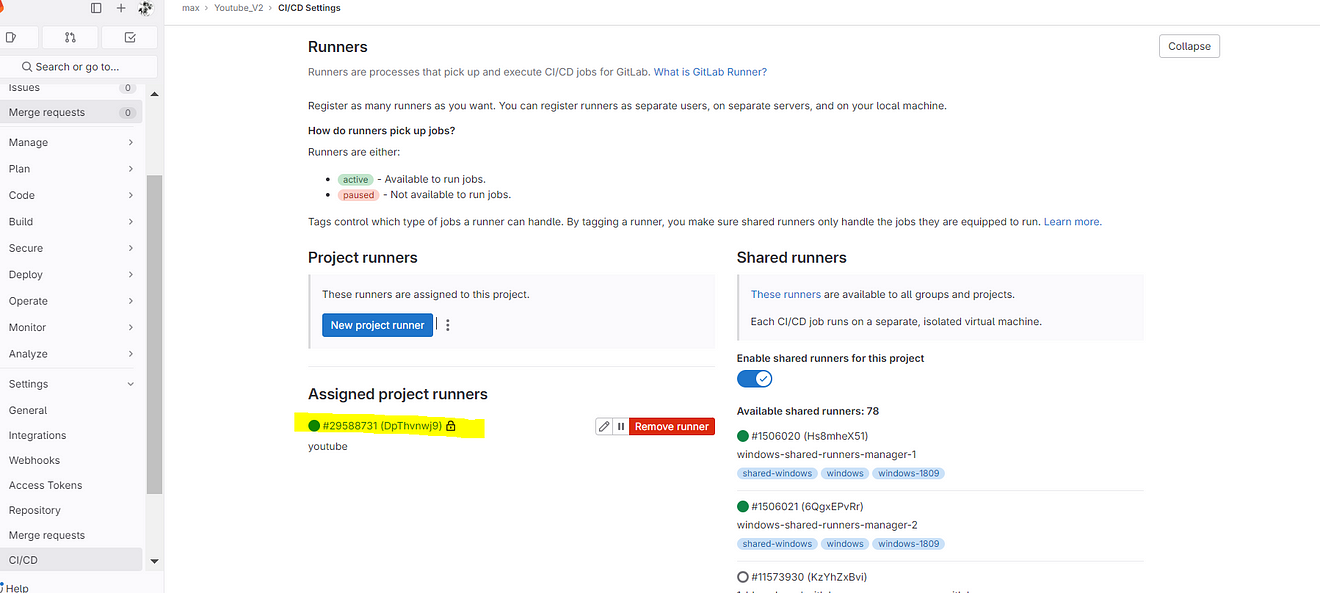
Click on the Pencil mark to edit
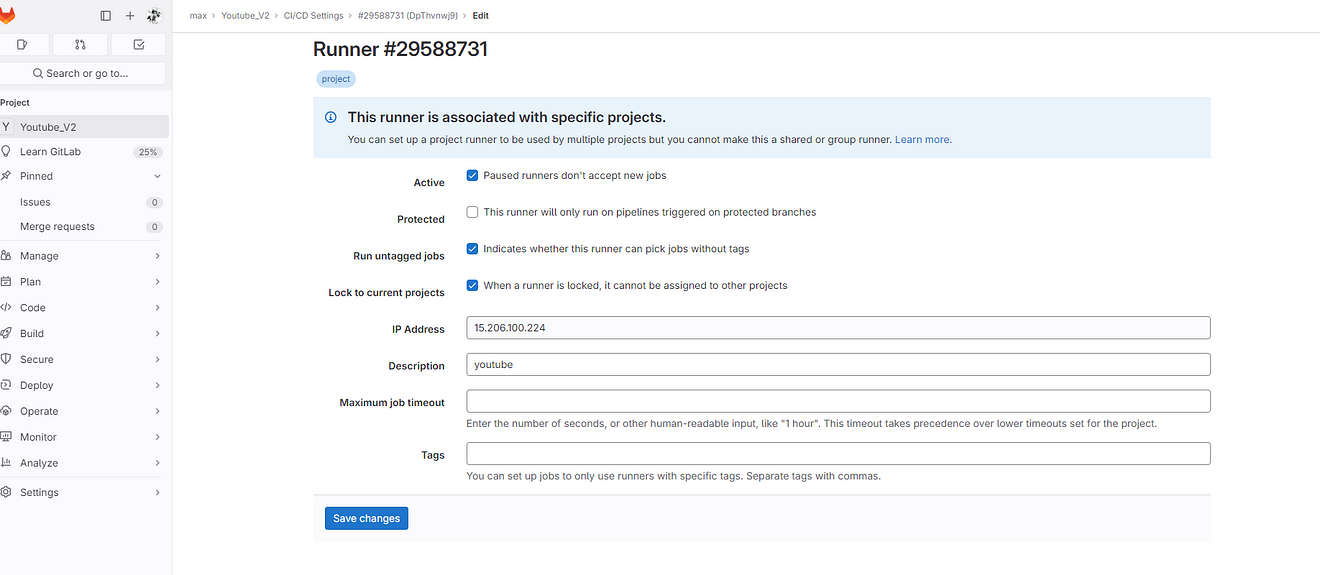
Step 6: Run the Application on the Docker container
Now edit the .gitlab-ci.yml file for the deploy stage
The complete file
Click on save changes.
deploy:
  stage: run container
  tags:
    - youtube        #use your own tags
  script:
    - docker run -d --name youtube -p 3000:3000 maxjith/youtubev2:latest
Commit changes, it will automatically start to build
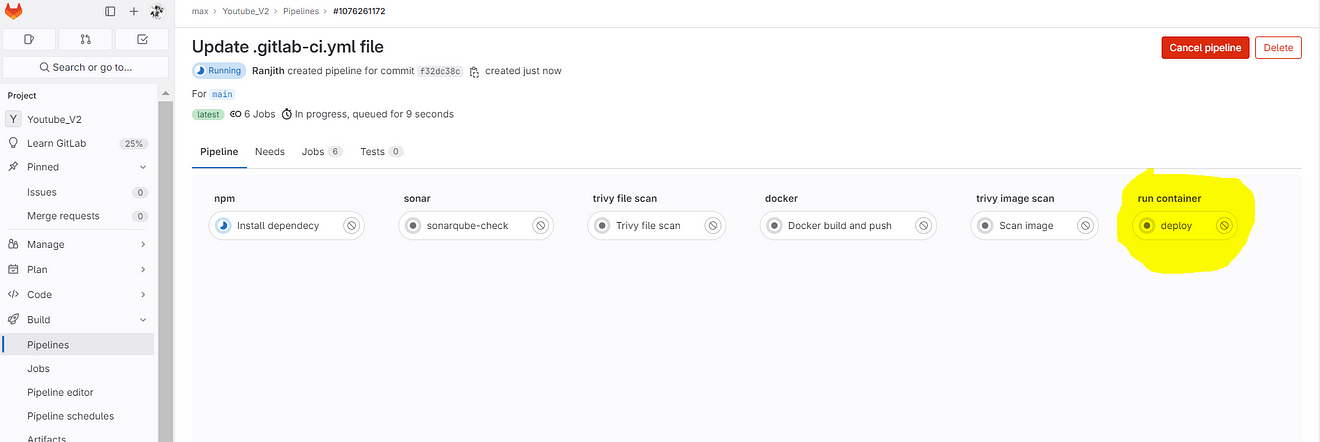
If you get an error like this

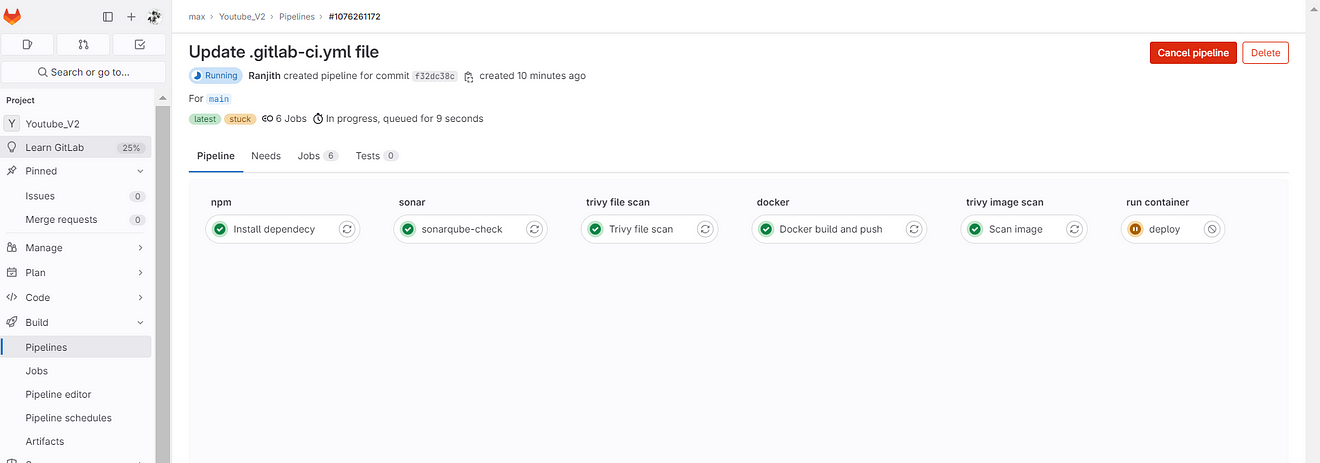
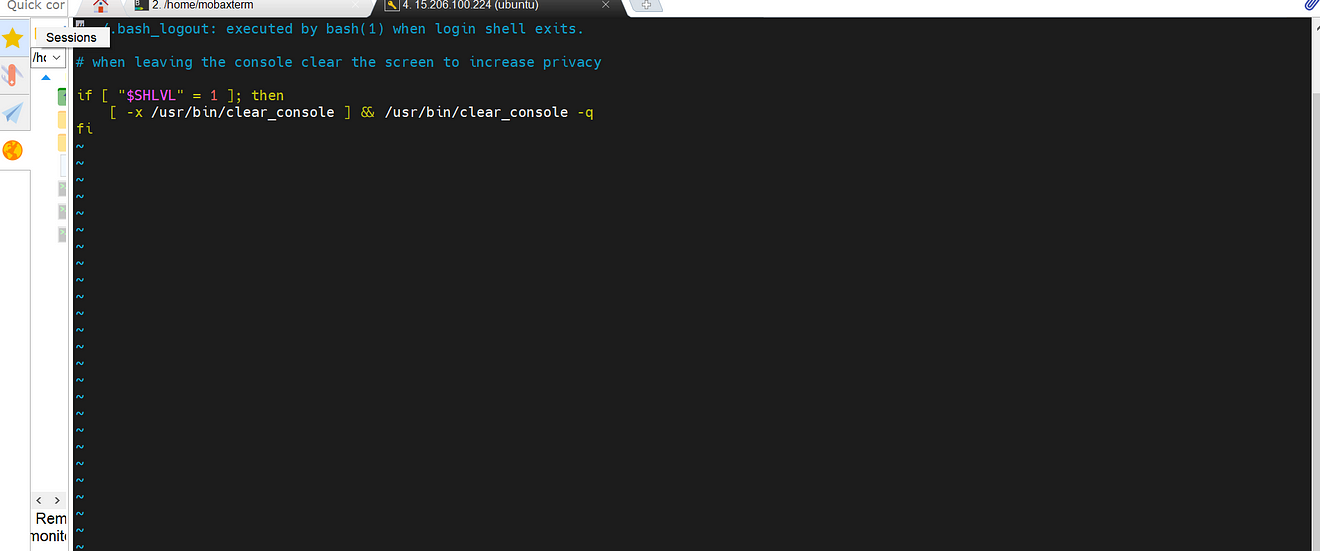
Comment them

Save and exit from that file and restart GitLab runner
sudo gitlab-runner restart

Now start and Run the GitLab runner
sudo gitlab-runner start
sudo gitlab-runner run
Now go to GitLab → Build → Pipelines
Build completed and click on Deploy job

See the output it ran a container on ec2
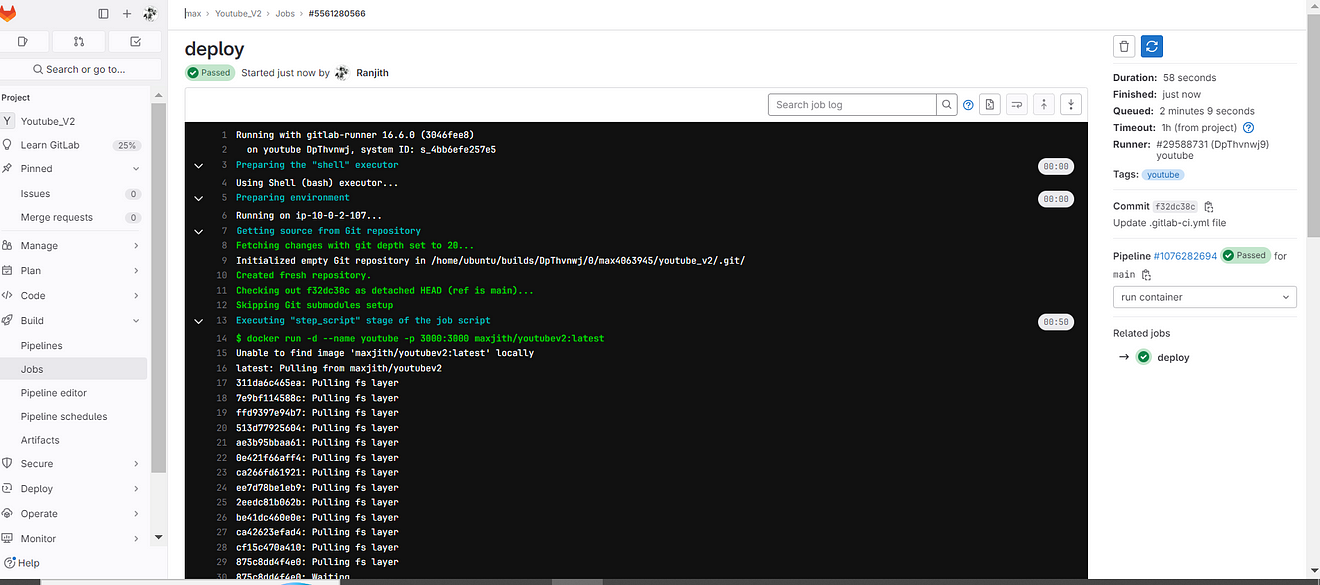
Now go to MobaXtreme or Putty and Provide the below command to see running containers.
docker ps

Container running.
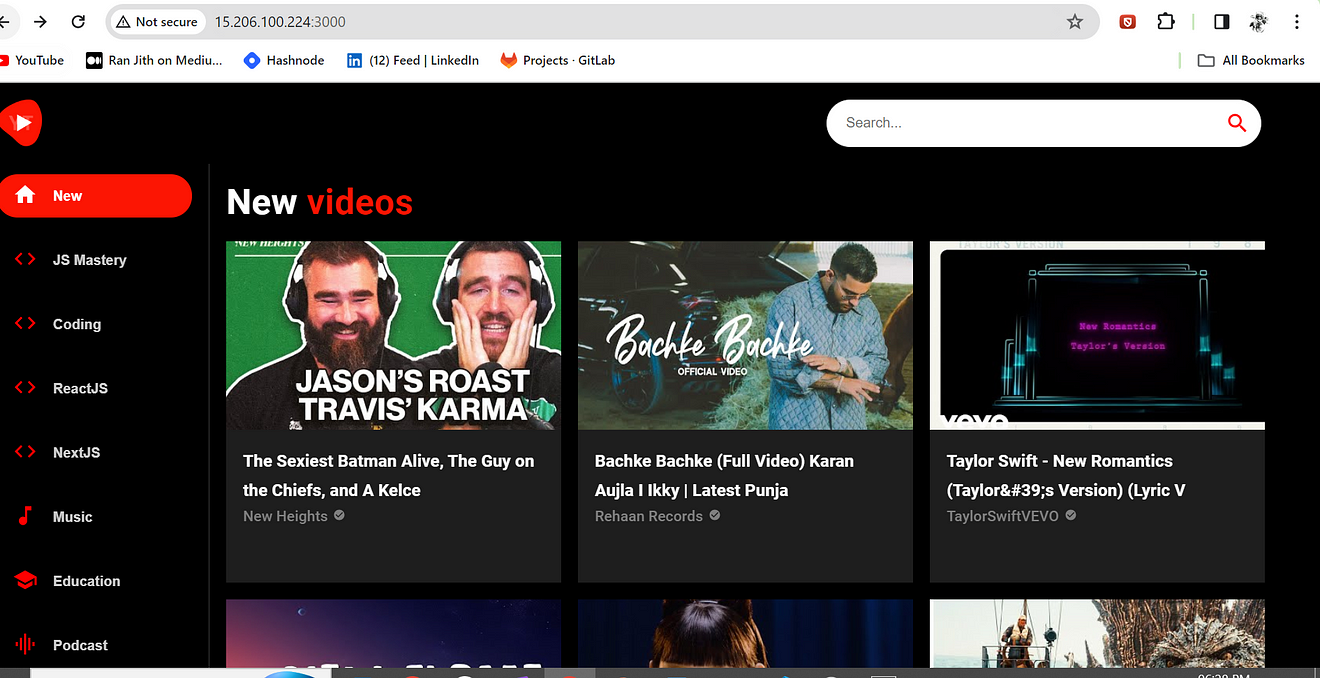
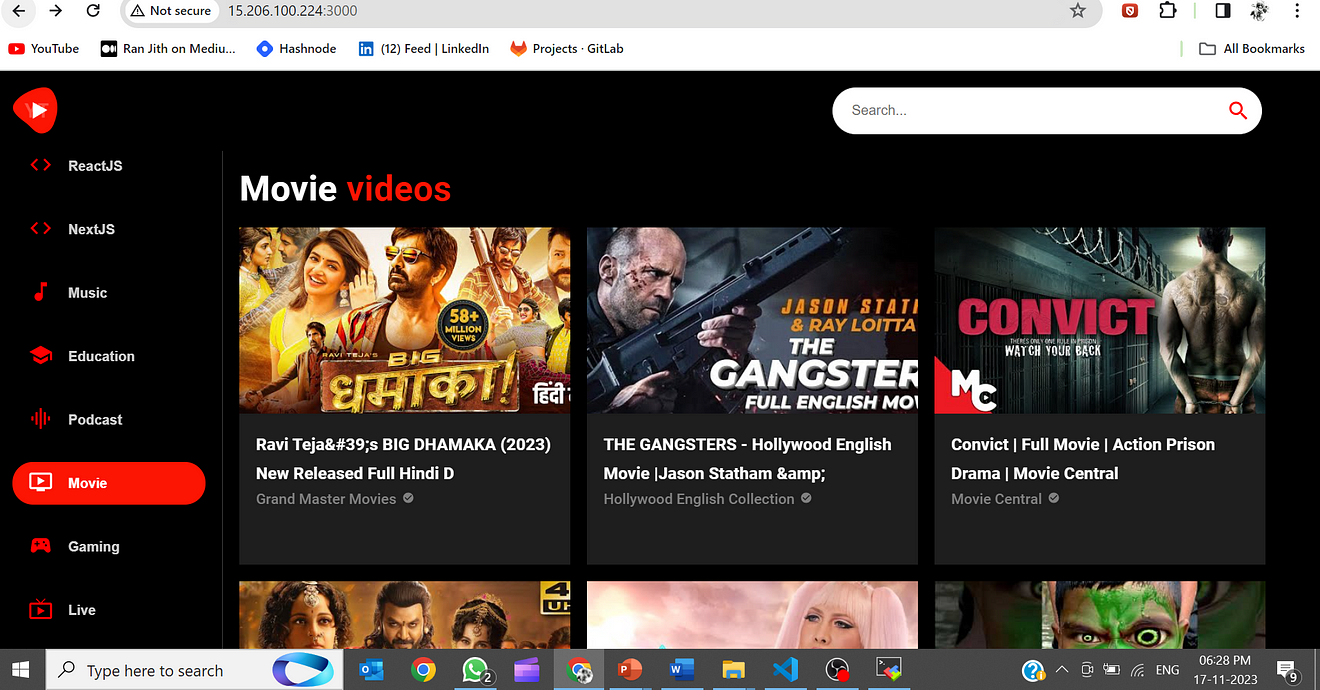
Step 7: Access the Application on Browser
Copy the Public IP of the ec2 instance and paste it into the Browser.
Don’t forget to open the 3000 port in the Security Group
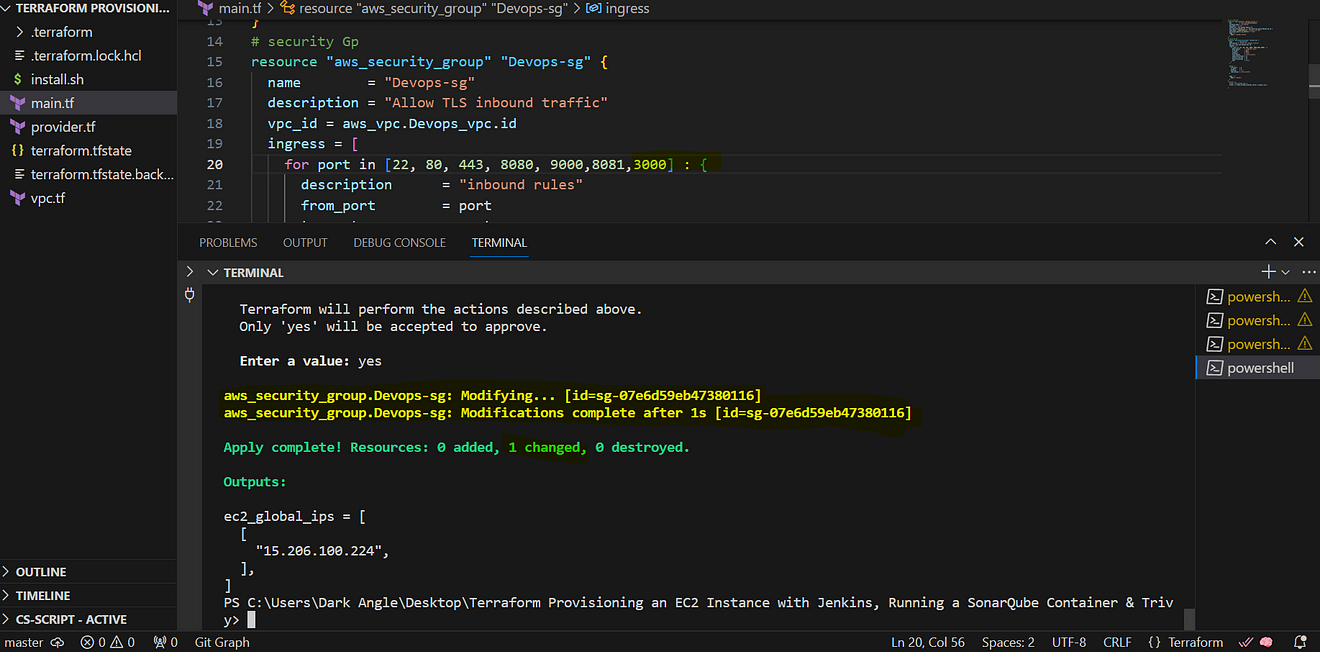
<Public-ip:3000>
Output
Step 8: Termination
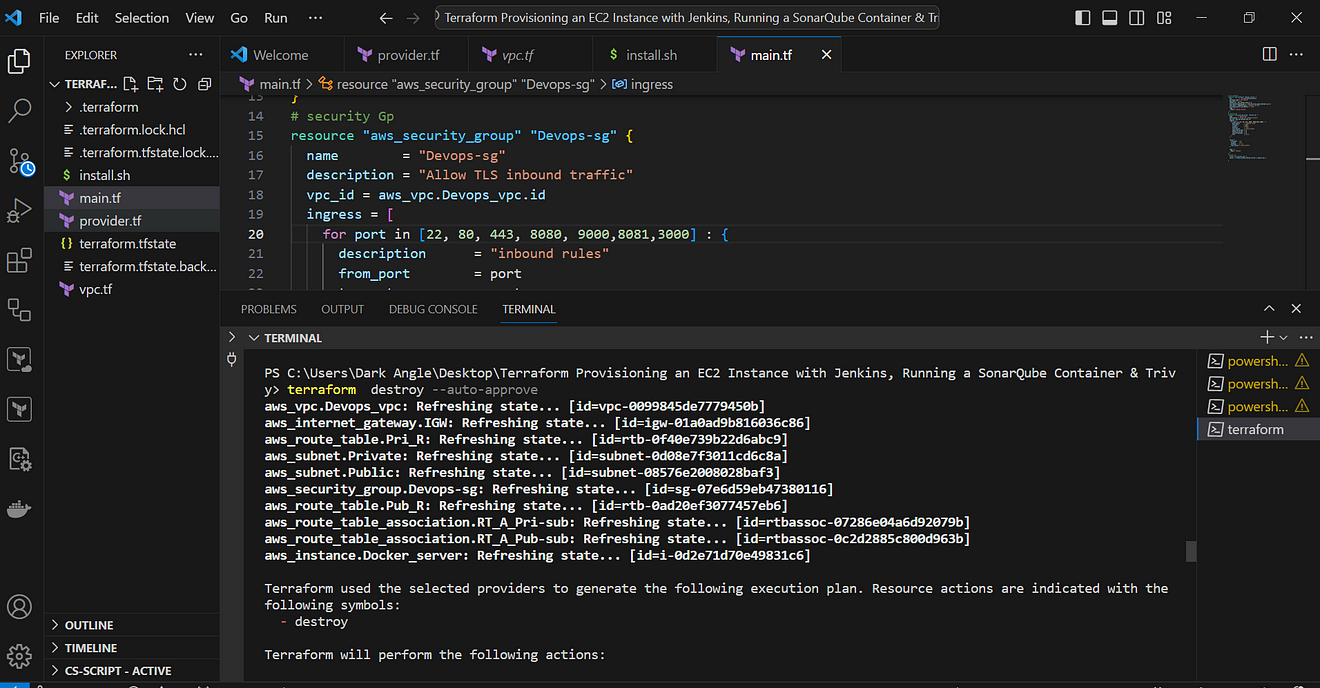
Delete the personal Access token of the docker.
Delete the containers.
docker stop <container name> docker rm <container name>
3. Delete the Ec2 instance.
And there you have it, folks! You’re now the DevOps master of your YouTube app deployment universe. We’ve journeyed through code, quality, security, containers, and automation, all with GitLab as our trusty sidekick. Now it’s your turn to unleash the power of DevOps and take your YouTube app to the next level!
